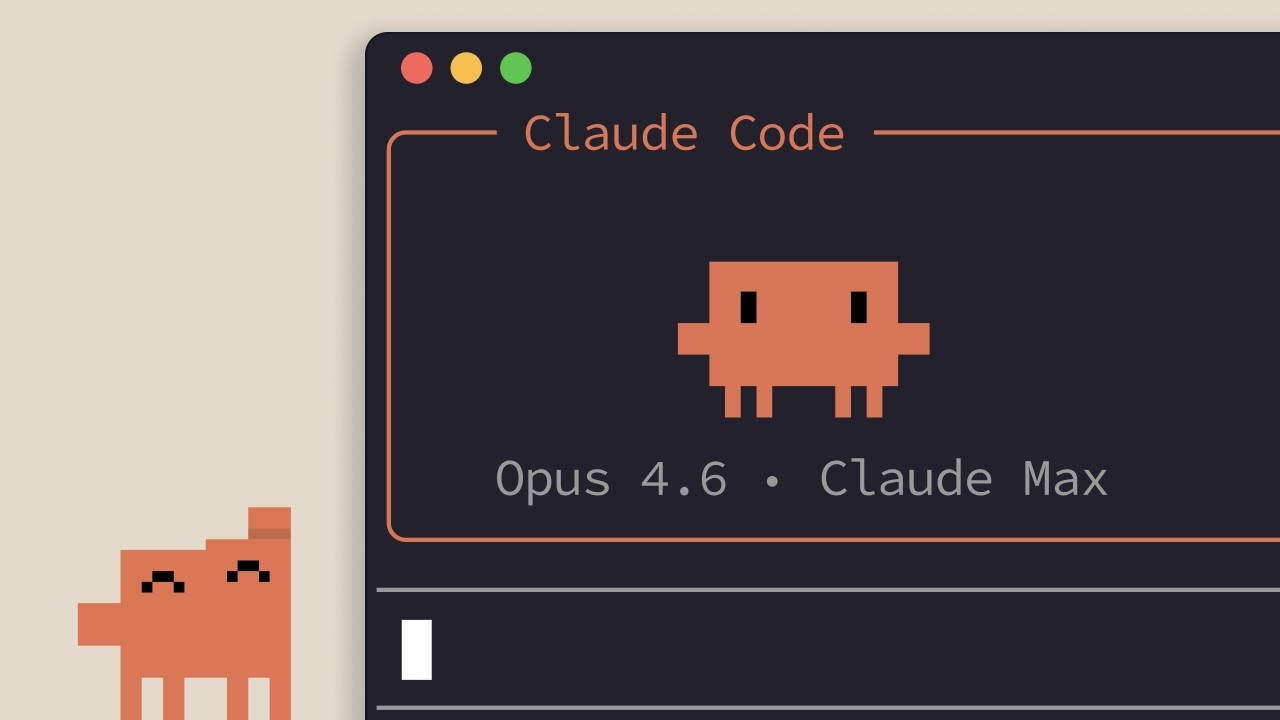
一个能动手的编码工具
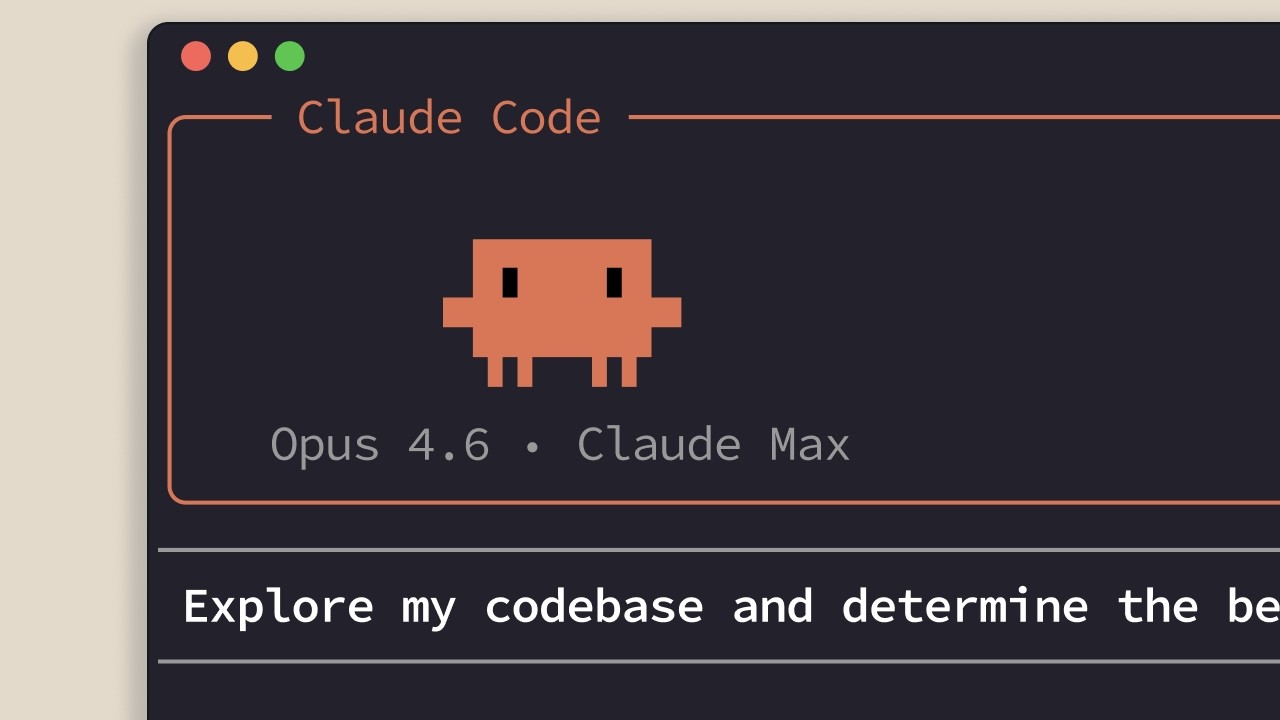
Claude Code 能理解你的整个代码库、编辑文件、运行命令,并和你已有的开发工具打通,帮你把事情更快做完。它可以用在:终端、VS Code、Claude 桌面端、网页版、以及 JetBrains 系列 IDE。本系列演示都在终端里进行。
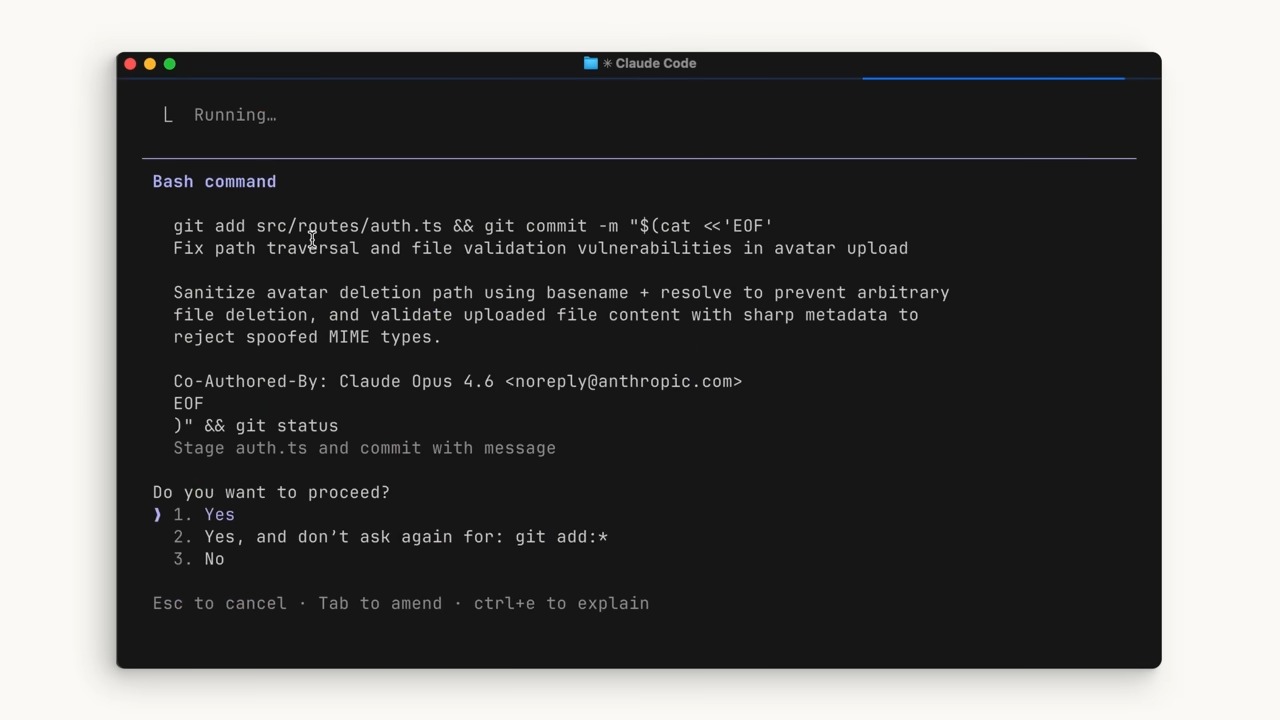
视频画面:Claude Code 在终端中工作
关键区别:它是「Agent(智能体)」
和 Claude.ai 网页版不同,Claude Code 直接拥有你终端和代码库的访问权,不用你把代码复制来复制去,它自己进去把活干了。所谓 AI 智能体,就是一个能感知环境、并主动采取行动去完成既定目标的软件——最朴素的形态,就是「让一个大模型在一个实时循环里不停跑」。
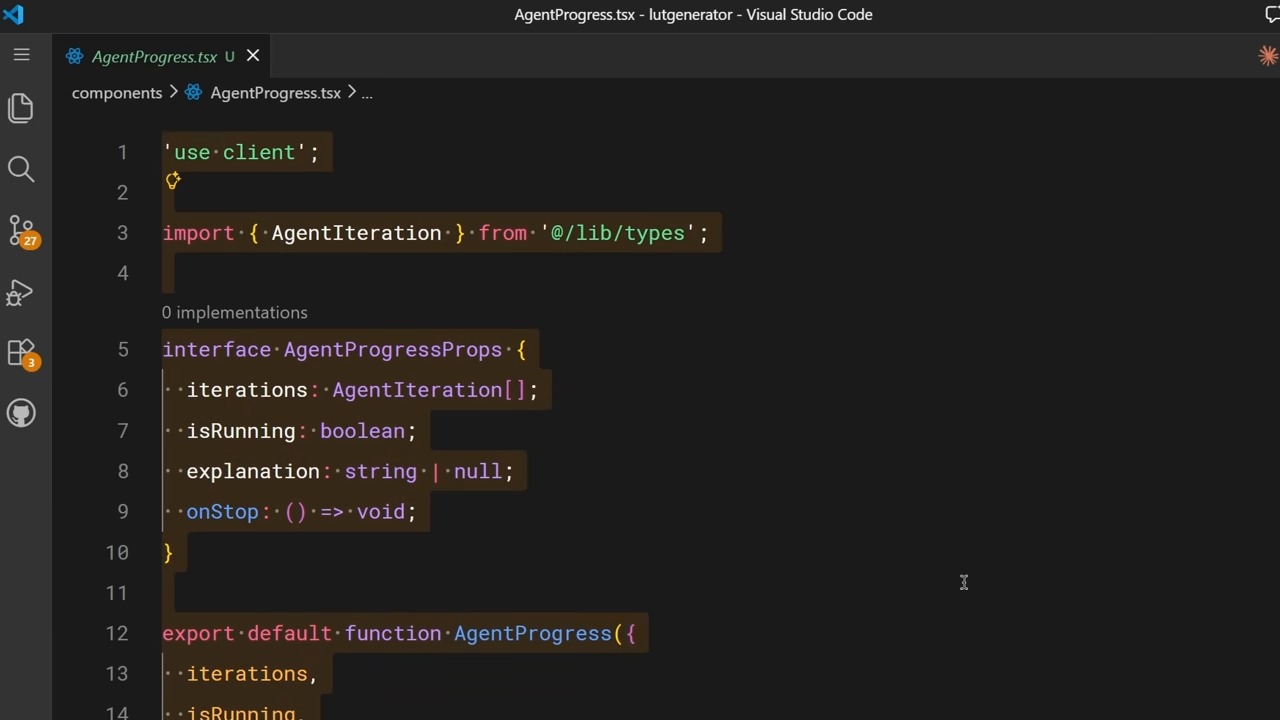
三个典型能力
① 读懂代码库:让它解释某个功能、或顺着代码追一个 bug;② 跑命令:执行构建脚本、跑测试、装依赖,并根据输出决定下一步;③ 查网络:需要某个最新 API 文档时,它能自己去查。

用好它之前,先记住这 3 点
① 上下文窗口(Context Window):相当于 Claude 的「工作记忆」,能装很多,但装不下一切——所以它会用策略性的方式在代码库里找答案,而不是把整个代码库塞进记忆。
② 它会先问你:默认情况下,运行命令或改动代码前,Claude Code 都会征求你同意,控制权始终在你手里——你可以选择更亲力亲为,也可以更放手。
③ 它会犯错:和任何工具一样它不完美,可能误解你的意图、引入新 bug、或把方案过度设计。
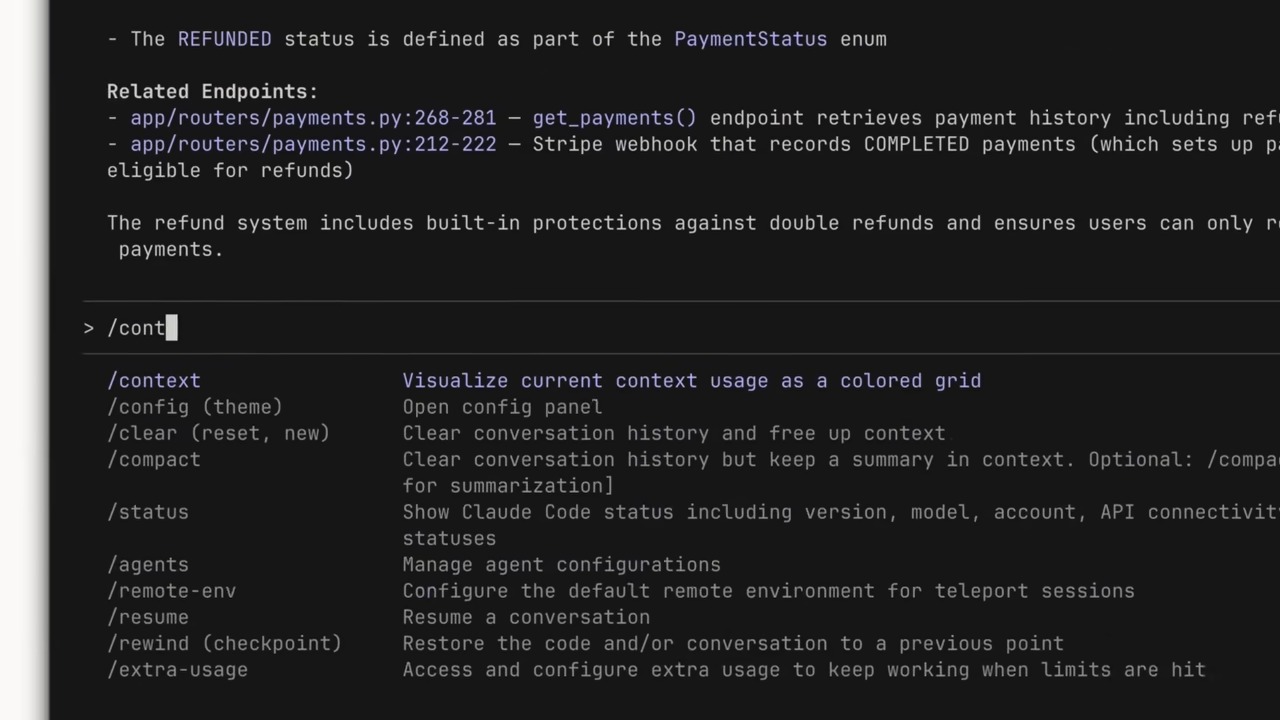
Claude Code 是一个能动手的编码智能体:读代码库、改文件、跑命令、连外部工具,帮你更快交付。今天就能在终端、VS Code、JetBrains、Claude 桌面端用上它。

逐字稿原文 · 中文 / English
00:04 Claude Code 是一个能动手的编码工具,它理解你的代码库、编辑你的文件、运行命令,并和你已有的开发工具集成,帮你更快把事情做完。它可以在终端、Visual Studio Code、Claude 桌面应用、网页端和 JetBrains 系列 IDE 中使用。不过本视频里我们会在终端中使用它。
00:41 和 Claude AI 不同,Claude Code 直接拥有你终端中文件和整个代码库的访问权。所以它不用把代码来回复制粘贴,而是自己进去把活全干了。最容易区分的一点是:Claude Code 以 AI 智能体的方式工作——一种能与环境交互、并采取行动来完成既定目标的软件。
01:13 它能读懂你的代码库、执行构建脚本、跑测试、安装依赖包,并用输出结果决定下一步做什么。如果需要最新的 API 参考文档,Claude Code 还能搜索网络。
01:44 第一是上下文窗口——Claude 的工作记忆。第二,它在运行命令或做改动前会征求许可。第三,它会犯错——可能误解你的意图、引入新 bug、或把方案过度设计。
02:17 快速回顾:Claude Code 是一个能动手的编码智能体。它读你的代码库、编辑文件、运行命令、连接外部工具,帮你更快交付。
00:04 Claude Code is an agentic coding tool that understands your code base, edits your files, runs commands, and integrates with your existing developer tools to help you get things done faster. It's available in your terminal, Visual Studio Code, the Claude desktop app, on the web, and JetBrains IDEs. But we'll be using it in the terminal for this video.
00:41 Unlike Claude AI, Claude Code has direct access to your files in your terminal and your entire code base. So instead of copying and pasting code back and forth, it can go in and do all the work itself. The easiest differentiator is that Claude Code works as an AI agent — software that can interact with its environment and perform actions to complete a defined goal.
01:13 It can read and understand your code base, execute your build script, run your tests, install packages, and use the output to decide what to do next. Claude Code can search the web if it needs documentation on the latest API references.
01:44 First is the context window — Claude's working memory. Second, it asks for permission before running commands or making changes. Third, it can make mistakes — it might misunderstand your intent, introduce a new bug, or over-engineer a solution.
02:17 Quick recap: Claude Code is an agentic coding tool. It reads your code base, edits your files, runs commands, and connects to external tools to help you ship faster.
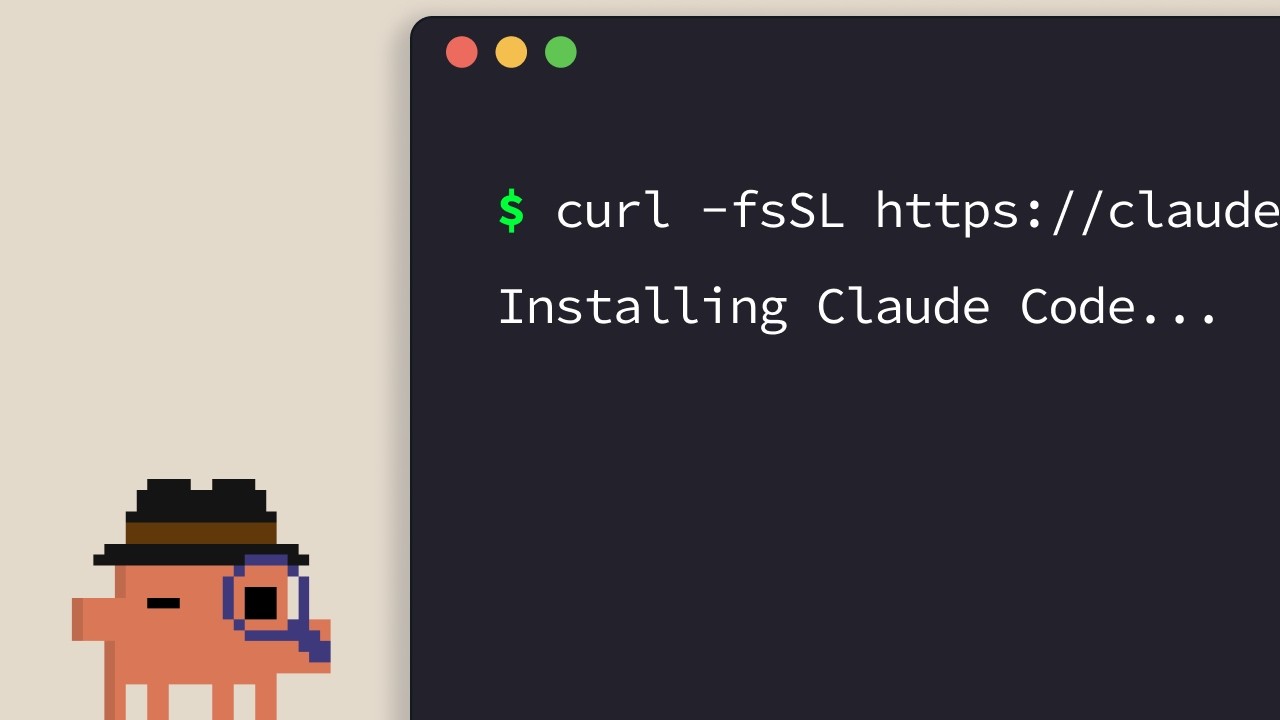
claude 就能用;终端、VS Code、JetBrains、桌面端、网页版五种入口任选,终端版更新最快、功能最全。按你的系统选一条
# macOS / Linux / WSL —— 一条 curl 搞定
curl -fsSL https://claude.ai/install.sh | bash

# 或用 Homebrew(注意:brew 装的不会自动更新)
brew install --cask claude-code

# Windows · PowerShell
irm https://claude.ai/install.ps1 | iex

# Windows · CMD(curl)或 winget(winget 同样不自动更新)
winget install Anthropic.ClaudeCode
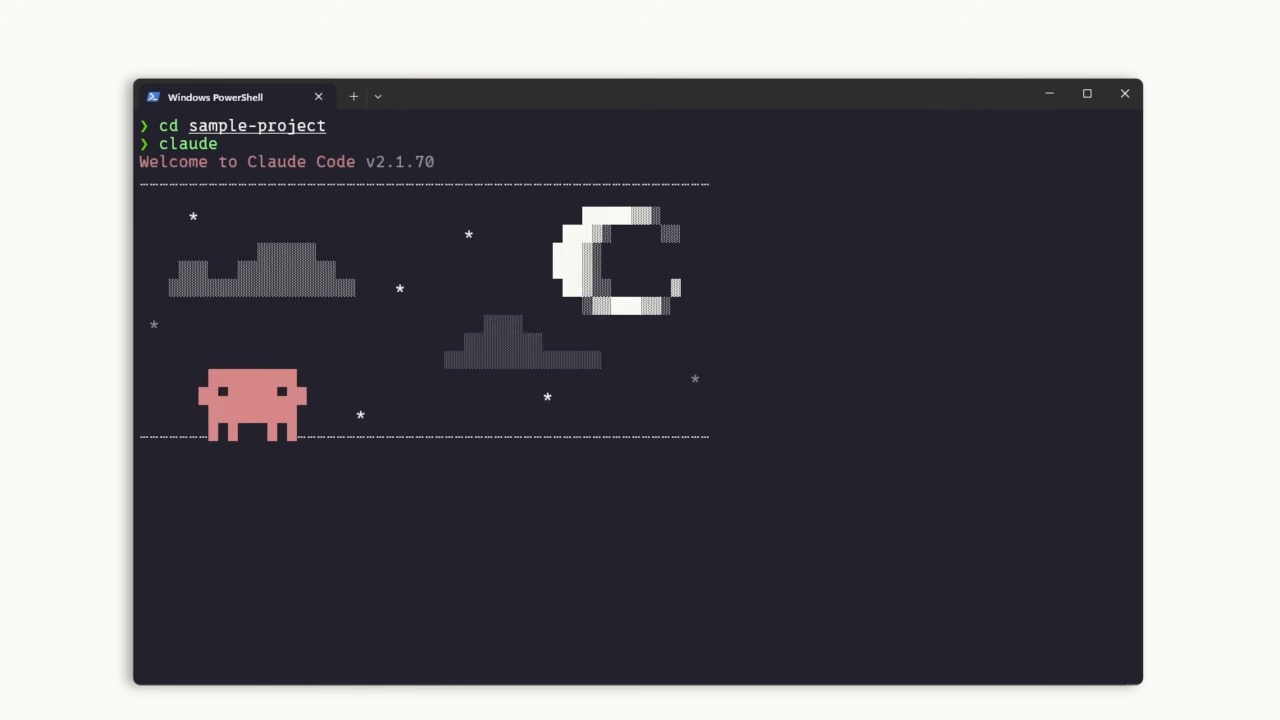
进目录,敲 claude
进入你的项目目录运行 claude,会有初始化引导:选配色主题、用 Claude 账号登录(Pro / Max / Enterprise 都行)或填 API Key。组织有 Claude Enterprise 账号的话记得选企业选项。注意:你在哪个目录运行 claude,它就拥有那个目录及其所有子目录的访问权。
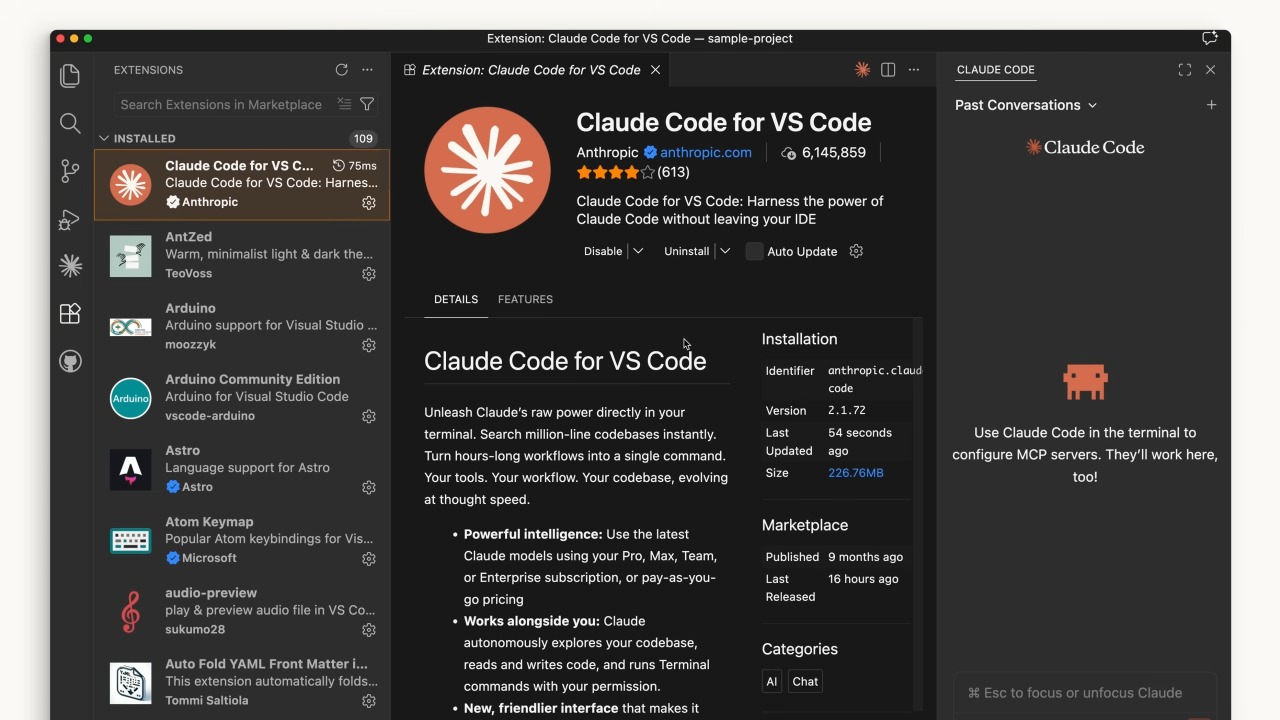
装官方扩展
打开扩展面板搜 “Claude Code”,认准 Anthropic 出品 + 蓝色对勾,安装后可能要重启 VS Code。之后用 Ctrl/Cmd+Shift+P 打开命令面板搜 Claude Code 开新标签;文件打开时点 Claude 图标也行。也可以在设置里关掉 UI,只用纯终端体验。
JetBrains 与 Claude 桌面端
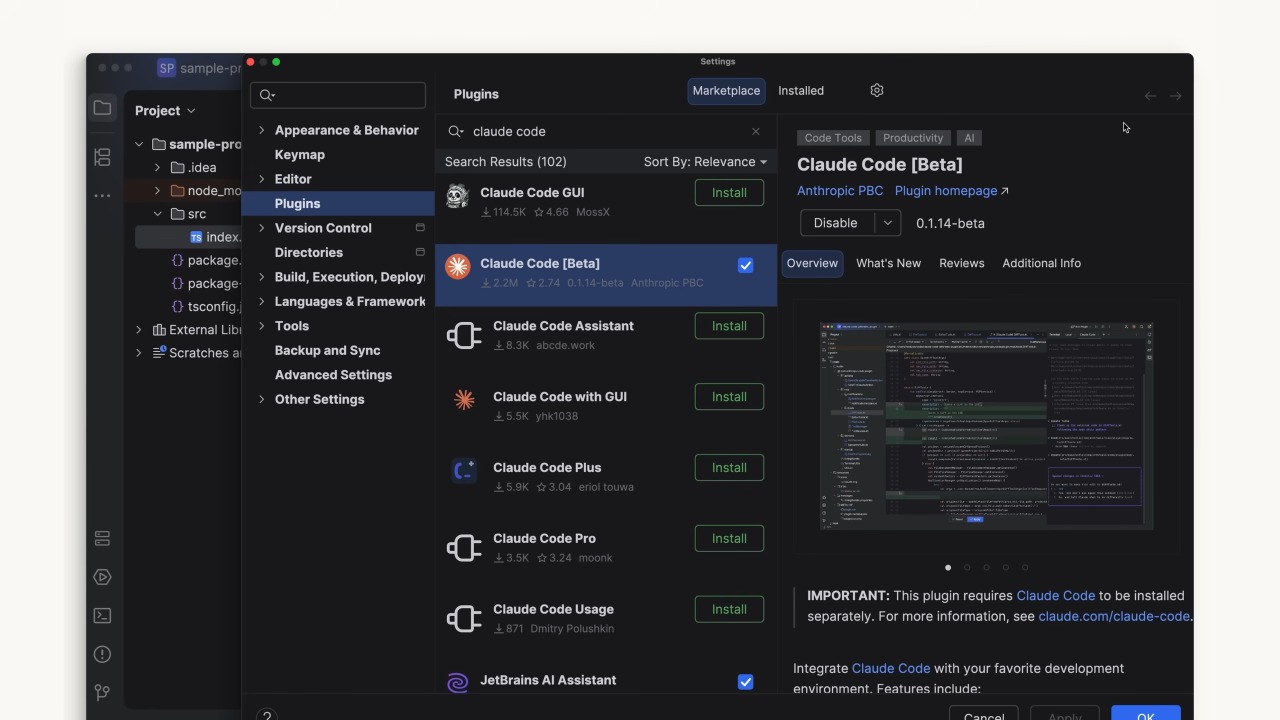
JetBrains:从 Marketplace 装 Claude Code 插件,重启 IDE 后会看到 Claude 图标,打开是一个和你并肩工作的终端面板。Claude 桌面端:装好登录后,顶部有个 “Code” 开关,观感像 Claude 聊天,但能锁定具体文件夹、改权限,甚至在云端环境里干活。
claude.ai/code,以及如何取舍
网页版去 claude.ai/code,体验接近桌面端,但只能操作 GitHub 仓库。取舍:想第一时间用上新功能 → 终端版(更新最快);想和编辑器深度融合 → IDE 集成;想让 Claude 在后台跑、你同时干别的 → 桌面端;想远程改 GitHub 项目或并行多会话 → 网页版。

逐字稿原文 · 中文 / English
00:04 如果你用 macOS、Linux 或 WSL,用这条 curl 命令一步装好。如果你偏好 Homebrew,可以用 brew install,但注意它没有自动更新。Windows 上用 PowerShell 的 Invoke-RestMethod 命令、CMD 里的 curl 命令、或 winget 命令。
00:35 进入你的项目目录,运行 claude。会经过一些初始引导,比如选择主题、用 Claude 账号(Pro、Max 或 Enterprise)或 API Key 登录。不管你在哪个目录运行 claude,它就拥有那个目录及其所有子目录的访问权。
01:05 在 VS Code 中,打开扩展面板搜索 Claude Code——认准 Anthropic 出品、带蓝色对勾的那个扩展。重启 VS Code,然后用 Ctrl/Cmd+Shift+P 打开命令面板。你也可以在设置文件里关掉 UI、直接用终端。
01:34 对于 JetBrains 系列 IDE,从 Marketplace 安装 Claude Code 插件并重启。在 Claude 桌面端,安装并登录后,顶部会出现一个 Code 开关——它让你能在特定文件夹工作、修改权限,甚至在云端环境工作。
02:10 网页端访问 claude.ai/code——和桌面端类似,但仅限 GitHub 仓库。想保持最新,终端是最佳选择,功能在那里上线最快。桌面端适合后台工作;网页端适合远程操作 GitHub 或并行多个会话。
00:04 If you're on macOS, Linux, or WSL, use this curl command to install it in one go. If you prefer Homebrew, you can use brew install, but note this doesn't have auto-update. For Windows, use the PowerShell Invoke-RestMethod command, a curl command in CMD, or a winget command.
00:35 Go to your project directory and run claude. You go through initial instructions like choosing your theme and signing in with your Claude account (Pro, Max, or Enterprise) or an API key. Whatever directory you run claude in, it has access to that directory and all its subfolders.
01:05 In VS Code, open the extensions panel and search Claude Code — the extension by Anthropic with the blue check. Restart VS Code, then open the command palette with Ctrl/Cmd+Shift+P. You can also opt out of the UI and use the terminal directly in your settings file.
01:34 For JetBrains IDEs, install the Claude Code plugin from the Marketplace and restart. On Claude Desktop, after install and sign-in you'll see a Code toggle at the top — it lets you work in a specific folder, change permissions, even work in a cloud environment.
02:10 On the web, go to claude.ai/code — similar to desktop but restricted to GitHub repositories only. The terminal is the best bet to stay up to date; features ship there fastest. Desktop is great for background work; web is great for remote GitHub work or parallel sessions.
Agentic Loop(智能体循环)
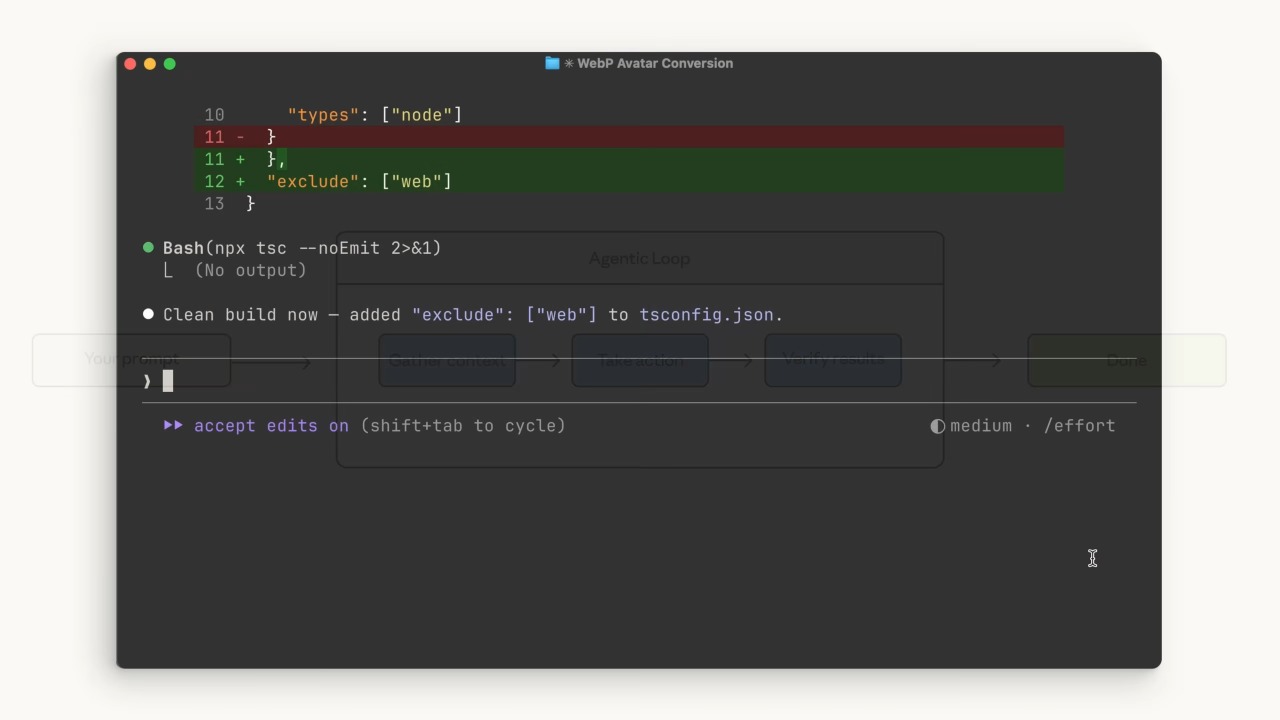
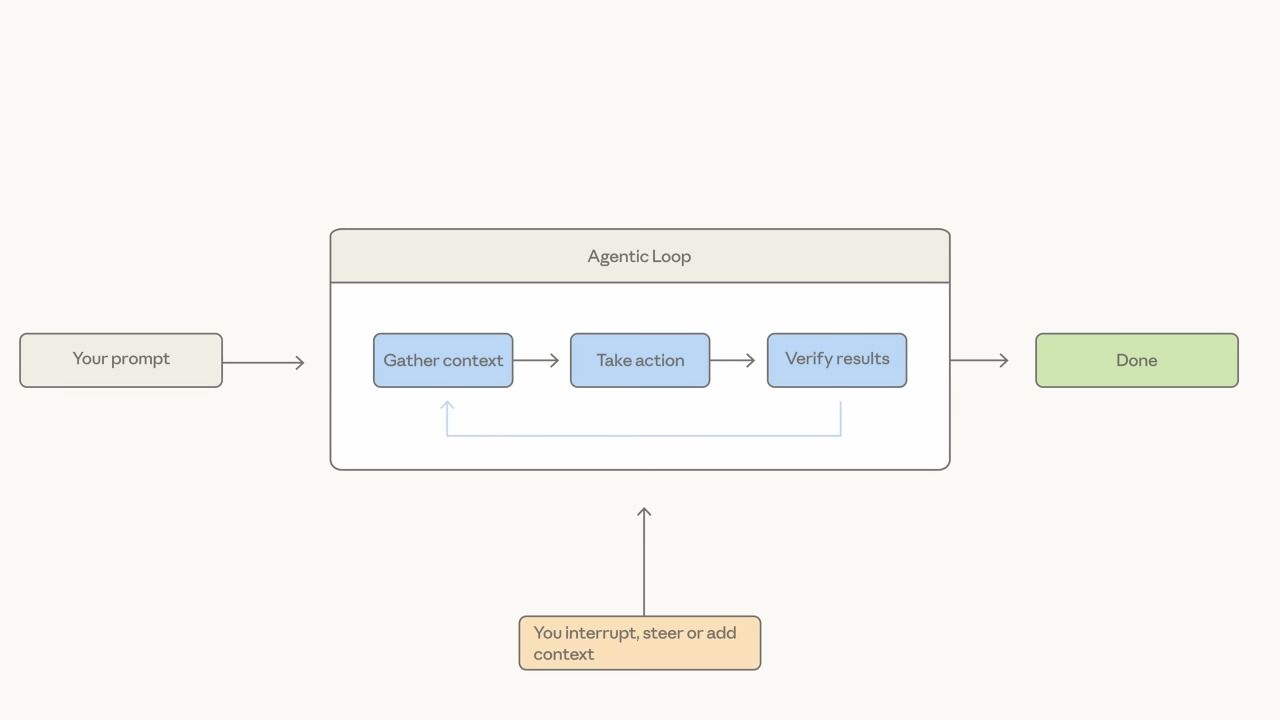
你输入提示词 → Claude Code 收集完成任务所需的上下文 → 调用模型,模型返回文本或一个工具调用 → Claude Code 执行这个动作(比如改文件、跑命令)→ 最后验证结果是否达成你最初的目标。
没达标就再来一遍
达标了,Claude 结束并等你下一条指令;没达标,它回到循环里继续跑,直到结果完整且可验证。整个过程里你都能随时补充上下文、打断、或引导它往你的目标走。上下文窗口决定它能记住、回看多少对话/文件/命令输出。
上下文压缩 与「工具」
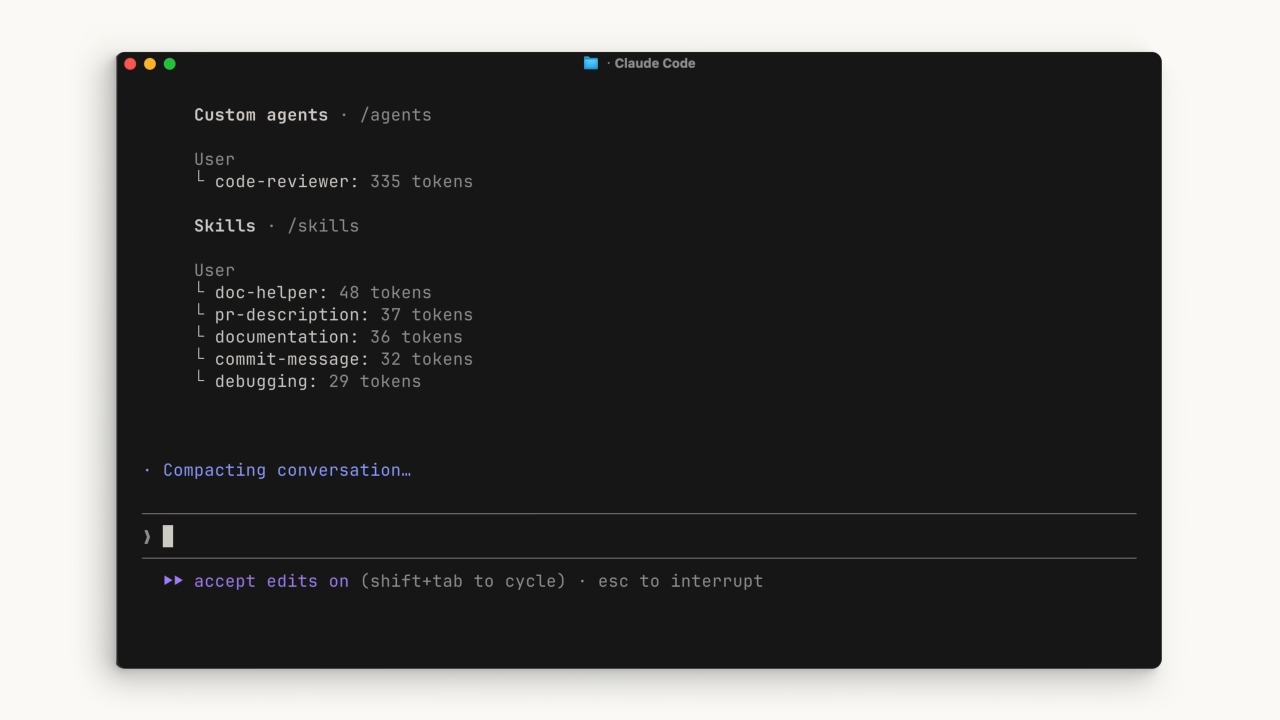
到达上下文上限时,Claude Code 会压缩(compact)对话:自动判断哪些能丢、哪些能总结,把占用降下来。「工具」是智能体的骨架——普通 AI 只能输入文本、输出文本,中间什么都做不了;工具让 Claude Code 能在恰当时机去执行代码逼近目标,比如「读文件工具」「网页搜索工具」。
三种权限模式(Shift+Tab 切换)
默认:改文件或跑 shell 命令前必须显式征得同意。Auto-accept:自动接受文件改动,但命令仍要问你。Plan 计划模式:只用只读工具,先研究并产出一份行动计划,再开始动手。跳过权限要谨慎——给 Claude Code 全权跑命令,意味着错误在发生前更难拦住。

Claude Code = 智能体循环 + 受管理的上下文窗口 + 工具 + 可配置的权限,全在你的终端里。它能读代码库、采取行动、自我验证——这正是它和聊天窗口的本质区别。
逐字稿原文 · 中文 / English
00:04 Claude Code 最好通过「智能体循环」来理解。你输入提示词;Claude Code 收集上下文,与模型交互,模型返回文本或一个工具调用,然后采取行动(编辑文件或运行命令),最后验证这些结果。
00:41 如果达成了目标,Claude 结束并等待;如果没有,它再跑一遍循环,直到结果完整且可验证。整个过程中,你可以补充上下文、打断、或引导模型。
01:14 一旦到达上限,Claude Code 会压缩你的对话。工具是智能体工作方式的骨架——它们让 Claude Code 执行代码以更接近任务,比如读文件工具或网页搜索工具。
01:47 Claude Code 有权限模式。默认会请求显式许可。自动接受会不询问就编辑文件,但仍会就命令询问你。计划模式用只读工具来编出一份计划。跳过权限时要谨慎。
02:18 Claude Code 把智能体循环、受管理的上下文窗口、工具、可配置的权限组合进你的终端——这与聊天窗口有本质区别。
00:04 Claude Code is best explained through the agentic loop. You enter a prompt; Claude Code gathers context, interacts with the model which returns text or a tool call, takes action (editing a file or running a command), then verifies those results.
00:41 If they achieve the goal, Claude finishes and waits; if not, it runs the loop again until results are complete and verifiable. Throughout, you can add context, interrupt, or steer the model.
01:14 Once you reach the limit, Claude Code compacts your conversation. Tools are the backbone of how agents work — they let Claude Code execute code to get closer to a task, e.g. a read-file tool or search-web tool.
01:47 Claude Code has permission modes. Default asks explicit permission. Auto-accept edits files without asking but still asks for commands. Plan mode uses read-only tools to compile a plan. Be cautious when skipping permissions.
02:18 Claude Code combines an agentic loop, a managed context window, tools, and configurable permissions into your terminal — fundamentally different from a chat window.
自动接受 vs 每次问你
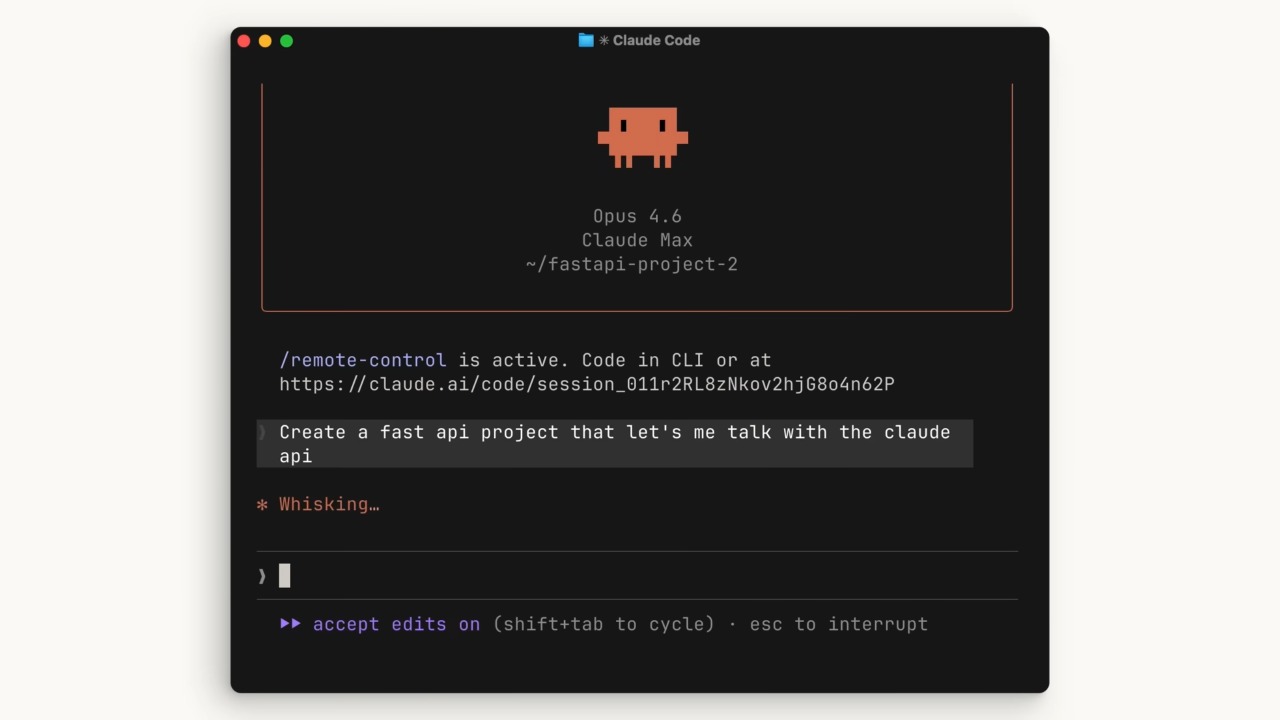
你可以选 Claude 自动接受每个文件改动,或每次都要你显式批准,用 Shift+Tab 在两种模式间循环。自动接受模式下,它会自动批准文件的编辑/创建,但运行命令仍会问你。没有对错,选你最自在的方式。
Plan Mode 擅长什么
计划模式接到你的提示后,用只读工具分析代码库、研究你建议的实现方式,还会就需要澄清的点反问你,最后给你一份详细的可执行计划。它特别适合规划复杂改动或做一次安全的代码审查。大多数时候你让 Claude 做的都是面向某功能的多步实现——这正是计划模式的强项。

一个真实例子
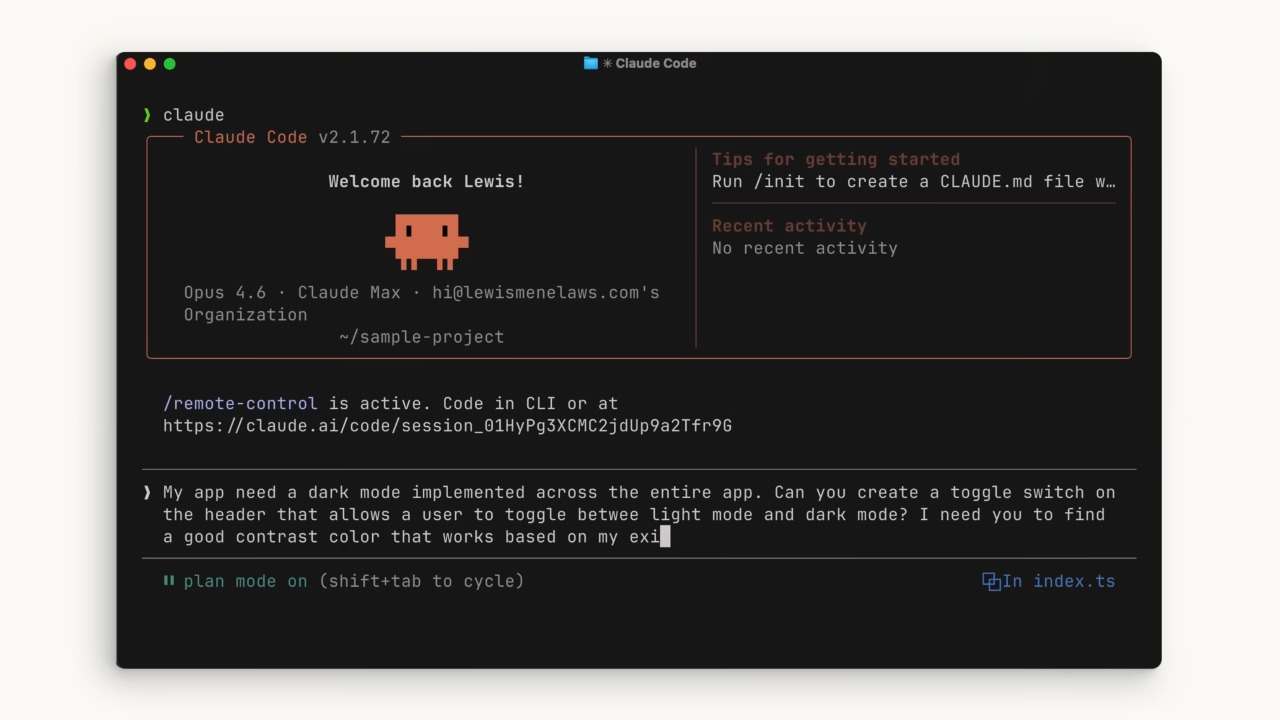
视频里有个 app 急需暗色模式开关。在项目根目录,连按几次 Shift+Tab 进入计划模式,然后写提示词:
My app needs a dark mode implemented across the entire app.
Can you create a toggle switch on the header that allows the
user to toggle between light mode and dark mode? I need you
to find a good contrast color that works based on my existing
light theme.
让 Claude 把方案规划出来。

结束后能看清它怎么想的
审查后觉得方案不错就让它执行。全部结束时,能清楚看到 Claude 做了什么、怎么得出结论,暗色模式效果也不错。要点:提示词尽量描述得具体;想全程掌控就用计划模式,让 Claude 在执行前把要达成的目标抠得更细。
逐字稿原文 · 中文 / English
00:04 你像跟任何 AI 助手说话一样跟 Claude Code 说话。你可以选择让 Claude 自动接受每个文件改动,还是每次都要显式许可。用 Shift+Tab 在两种模式间循环。自动接受模式下它会自动批准文件编辑,但运行命令仍会请求许可。
00:34 Shift+Tab 菜单里有计划模式。它用只读工具分析你的代码库、提出澄清问题、返回一份长而详细的计划。非常适合规划复杂改动或做安全的代码审查。
01:04 我有一个 app 需要一个暗色模式开关。在根目录我按 Shift+Tab 进入计划模式,写下提示词:「我的 app 需要在整个应用里实现暗色模式。你能不能在头部做一个切换开关……基于我现有的浅色主题找一个对比度合适的颜色。」
01:32 审查之后,看起来不错。最后你能明确看到 Claude 做了什么、它是怎么得出结论的。尽量描述得具体一些;用计划模式在执行前把细节抠清楚。
00:04 You talk to Claude Code like any AI assistant. You can choose whether Claude auto-accepts every file change or requires explicit permission each time. With Shift+Tab you cycle between modes. In auto-accept mode it auto-approves file edits but asks permission to run commands.
00:34 Within the Shift+Tab menu is plan mode. It uses read-only tools to analyze your code base, asks clarifying questions, and returns a long detailed plan. Great for planning complex changes or a safe code review.
01:04 I have an app that needs a dark mode toggle. In the root directory I hit Shift+Tab into plan mode and write the prompt: "My app needs a dark mode implemented across the entire app. Can you create a toggle switch on the header… find a good contrast color based on my existing light theme."
01:32 After reviewing, it looks good. At the end you see explicitly what Claude did and how it reached its conclusion. Try to be as descriptive as possible; use plan mode to get into the nitty-gritty before executing.
没有它,每次都要从零摸索
没有 CLAUDE.md 时,Claude Code 每次都像第一次来:重新探索代码库、搞清依赖、搞清已有功能,有时还得靠猜——猜就更难往正确方向引导。
一个会被自动读取的 Markdown
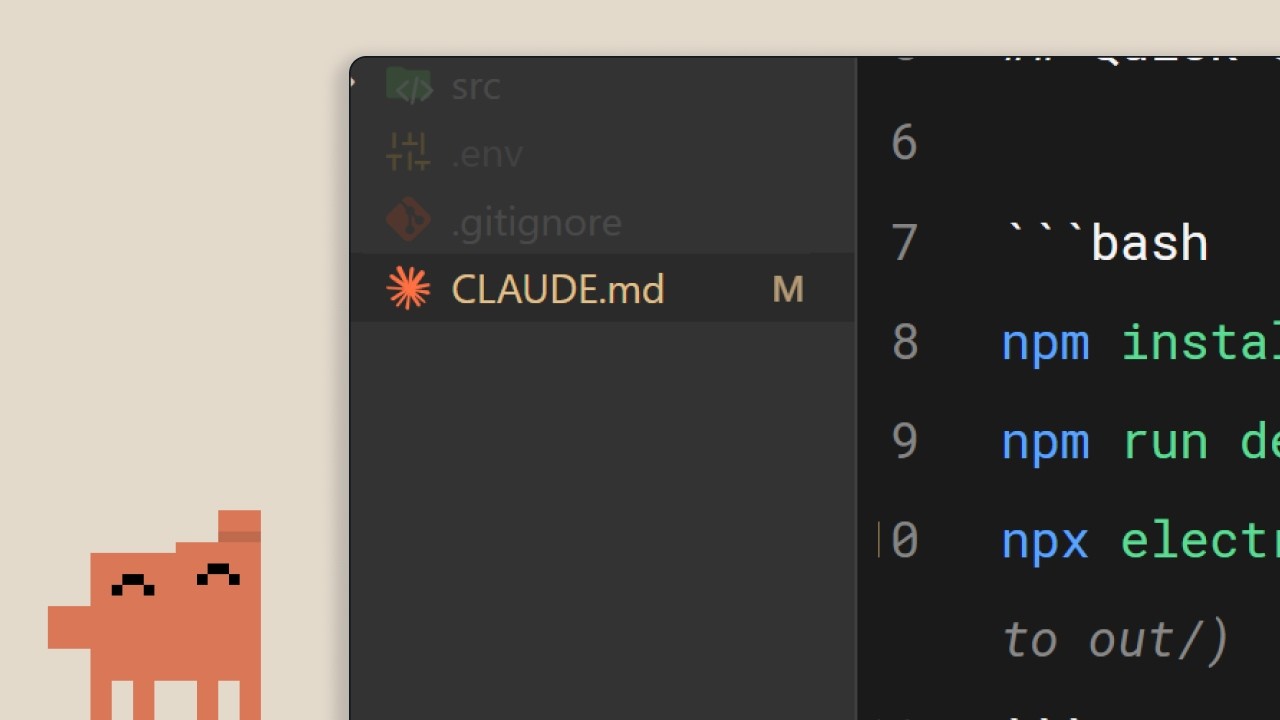
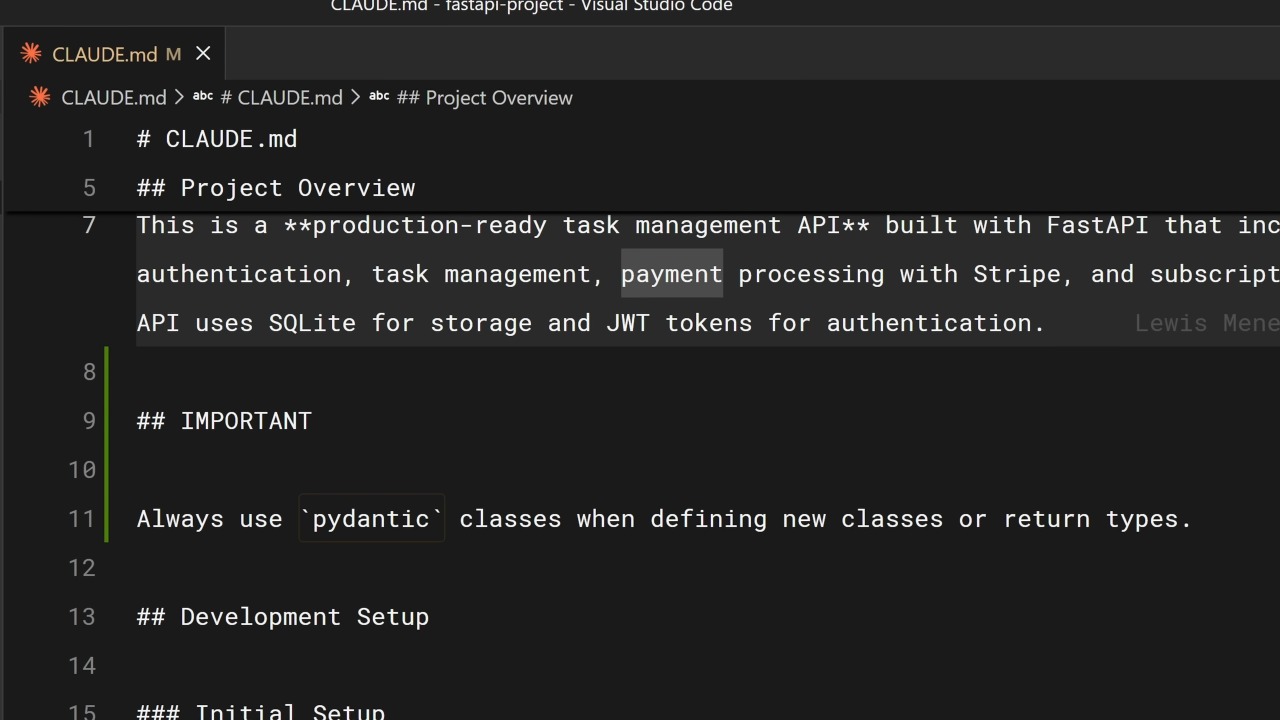
它是放在项目根目录的 markdown 文件,每次开会话 Claude Code 自动读,相当于代码库的「入职脚本」——本质上它的内容会被拼接到你自己的提示词前面。可以跑 /init 命令让 Claude 基于你的代码库自动生成一份。
# 在项目里让 Claude 自动生成 CLAUDE.md
/init

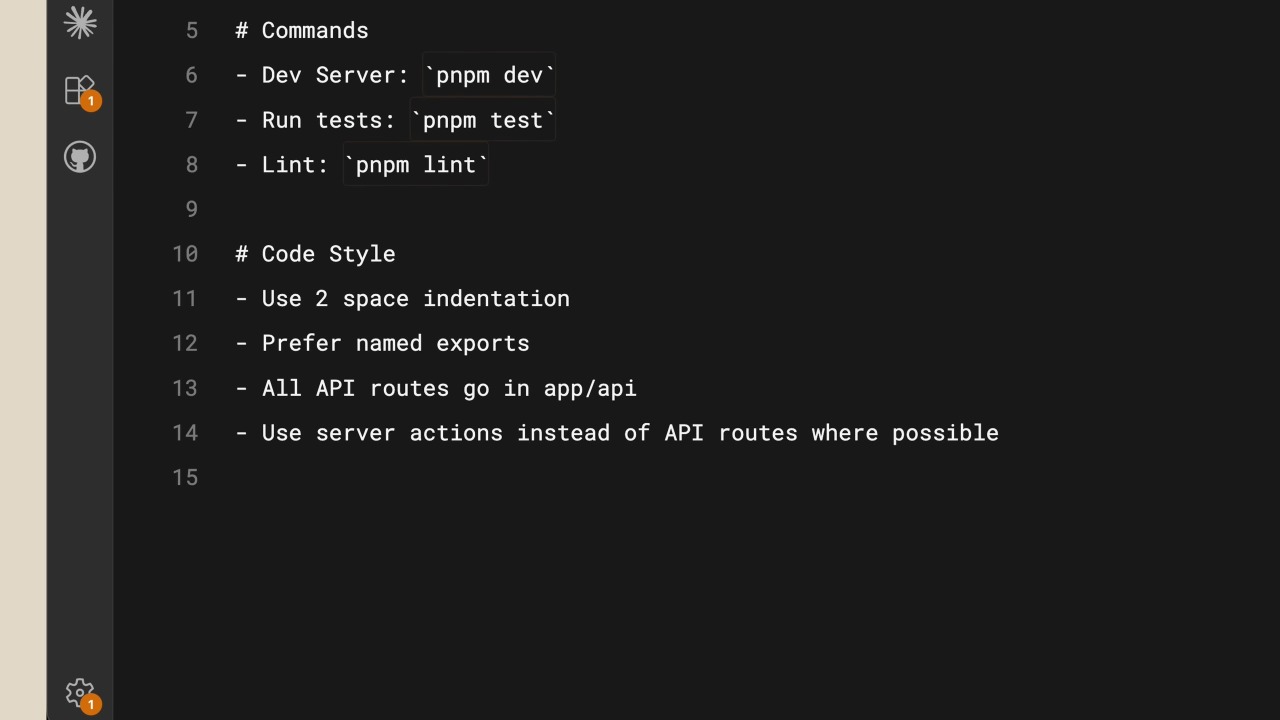
技术栈 + 命令 + 代码风格
示例(一个用 App Router、Tailwind、Drizzle ORM 的 Next.js 15 应用):
# 技术栈
Next.js 15 (App Router) · Tailwind · Drizzle ORM

# 命令
dev server · run tests · lint

# 代码风格
- 两空格缩进
- 优先具名导出 (named exports)
- 所有 API 路由放 app/api
- 能用 server actions 就别用 API routes
有了它,你让 Claude 建 React 组件时,它一上来就知道用 Tailwind(或你用的任何框架)来写。
项目级 vs 用户级
项目级 CLAUDE.md:在项目根目录,提交进版本控制给团队共用。用户级 CLAUDE.md:在你的配置目录,只属于你、跨所有项目生效——放个人偏好,比如你怎么写代码注释。
怎么把它养好
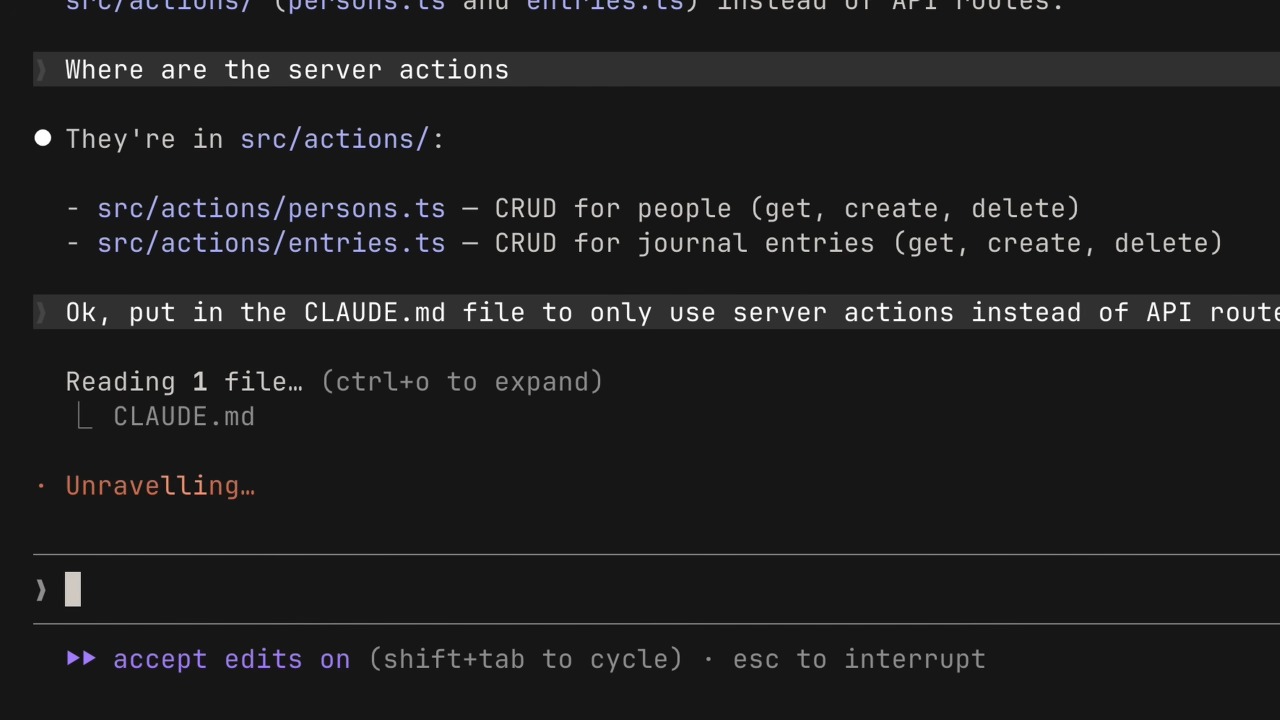
① 让它记住纠正:当你不得不纠正 Claude(比如「永远用 server actions 而不是 API routes」),就明确叫它把这条存进 memory,下次回到项目它就一直记得。
② 引用文档用 @:项目里有想让 Claude 参考的文档,直接用 @ + 文件路径。
③ 先别急着建:建议项目一开始先不要 CLAUDE.md,先观察你需要在哪些地方反复纠正模型——这样能让文件保持精简、只留必要信息。
一次糟糕的会话和一次高效会话,差别就在「上下文」,而 CLAUDE.md 就是你提供上下文的方式:从技术栈、个人偏好、再到命令,随用随补、逐步长出来。
逐字稿原文 · 中文 / English
00:02 最有用的部分之一就是 CLAUDE.md 文件——关于你项目的持久记忆。没有它,Claude 每次都得从零开始、重新探索代码库、并做出各种假设。
00:32 它是放在项目根目录的 markdown 文件;Claude Code 每个会话都会自动读它——就像一份入职脚本。它的内容会被拼接到你的提示词上。运行 /init 让 Claude 根据你的代码库生成一份。
01:02 示例:一个用 app router、Tailwind、Drizzle ORM 的 Next.js 15 应用。命令:开发服务器、跑测试、lint。代码风格:两空格缩进、具名导出、API 路由放 app/api、优先用 server actions。
01:38 有一个层级:项目级 CLAUDE.md 放在根目录(通过版本控制共享),用户级 CLAUDE.md 放在你的配置目录,只属于你、跨所有项目——把个人偏好放那里。
02:05 如果你纠正了 Claude,明确叫它保存进 memory。用 @ 符号加文件路径来引用文档。我们建议一开始先不要 CLAUDE.md,这样你能看清在哪些地方必须纠偏,保持它精简。
02:34 一次令人沮丧的会话和一次高效会话的差别就在于上下文——CLAUDE.md 文件就是你提供上下文的方式。从技术栈、偏好开始,然后是命令。
00:02 One of the most useful parts is the CLAUDE.md file — persistent memory about your project. Without it, Claude has to start fresh, re-explore the code base, and make assumptions.
00:32 It's a markdown file at the root of your project; Claude Code reads it automatically every session — like an onboarding script. Its contents are appended to your prompt. Run /init to make Claude generate one from your code base.
01:02 Example: a Next.js 15 app using the app router, Tailwind, Drizzle ORM. Commands: dev server, run tests, lint. Code style: two-space indentation, named exports, API routes in app/api, prefer server actions.
01:38 There's a hierarchy: a project-level CLAUDE.md in the root (shared via version control), and a user-level CLAUDE.md in your config folder, just for you across all projects — put personal preferences there.
02:05 If you correct Claude, explicitly ask it to save to memory. Reference docs with the @ symbol and a file path. We recommend starting without a CLAUDE.md so you see where you must course-correct, keeping it compact.
02:34 The difference between a frustrating session and a productive one comes down to context — the CLAUDE.md file is how you provide it. Start with your stack, preferences, then commands.
探索 + 计划
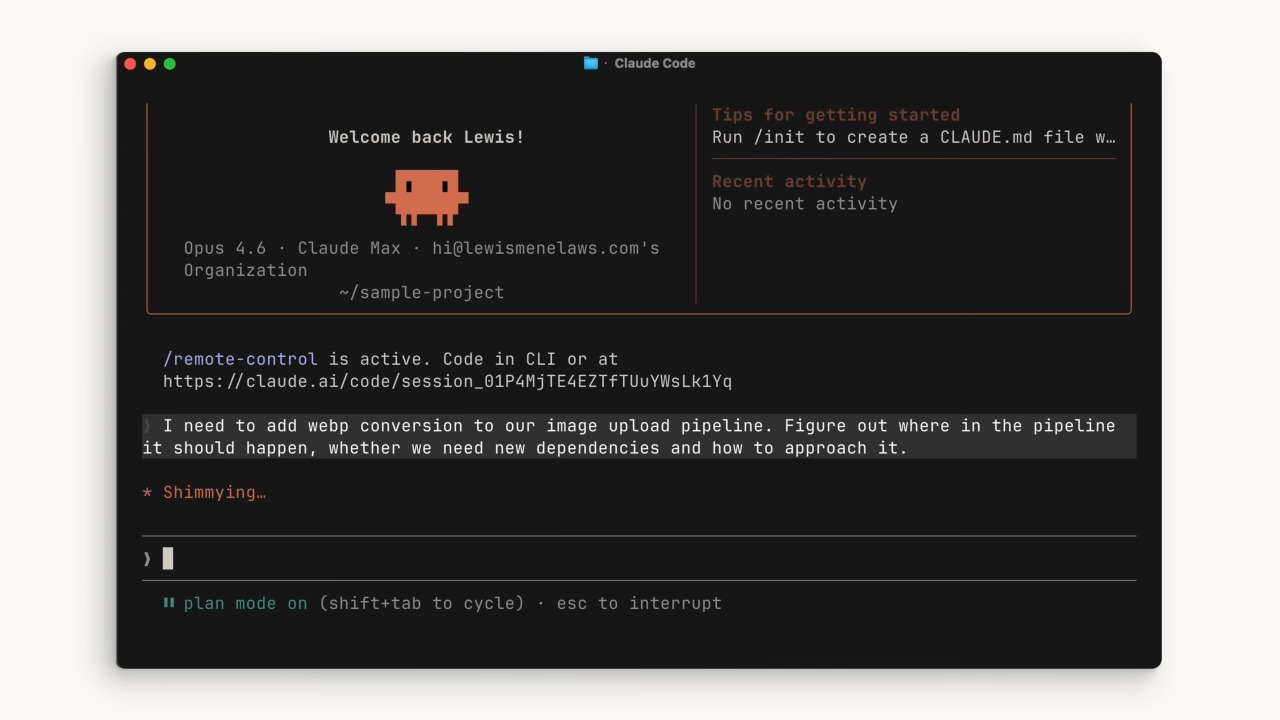
处理「探索」「计划」最快的方式就是计划模式。计划模式下 Claude不能改文件,只读文件做研究。按 Shift+Tab 直到文本框下方出现 plan mode。示例提示词:
I need to add WebP conversion to our image upload pipeline.
Figure out where in the pipeline it should happen, whether
we need new dependencies, and how to approach it.
动代码前的最佳纠偏点
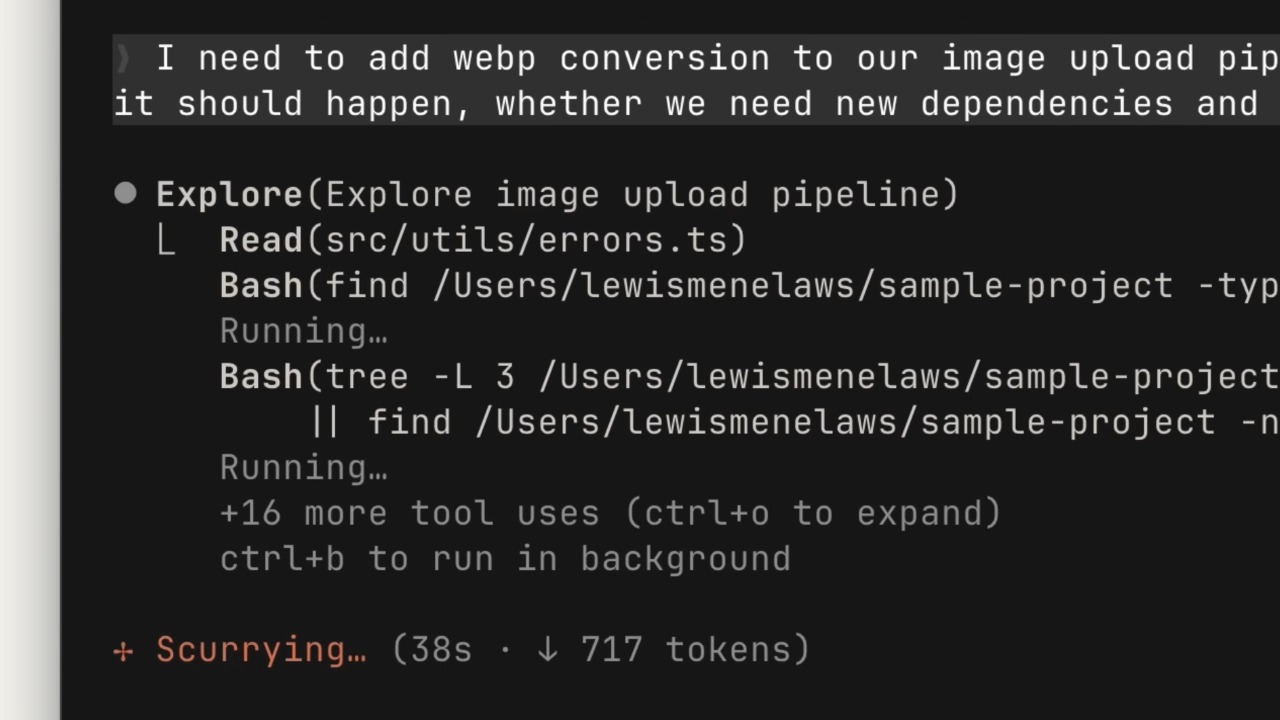
Claude 会读相关文件、做网页搜索、给你一份行动计划。务必审查它是否符合你的标准,不行就让它补充或修订。这里是最适合纠偏的地方,因为还没写任何代码。不进计划模式时,也可以直接让 Claude「探索一下代码库」。
编码阶段
计划满意后选 approve,让 Claude 逐条勾掉清单项。你可以决定让它自动接受文件改动还是每次都问。Claude 会尽力在认定计划完成前自查代码库,但有时仍需你纠偏——这正是计划模式的好处:计划完成后,我们还保留了「它是怎么一步步得到结果的」这层上下文来指导下一步决策。

给它判断「对」的标准和工具
要让 Claude 对结果有信心,它必须清楚什么算「正确」——写计划时把这点写明确。给它能完成目标的工具能省掉大量来回:比如做 Web UI,装上 Claude in Chrome 扩展,Claude Code 就能控制一个标签页、在认定完成前实测 UI。项目里也要有一套测试集让它持续校验。

测试是「真理来源」
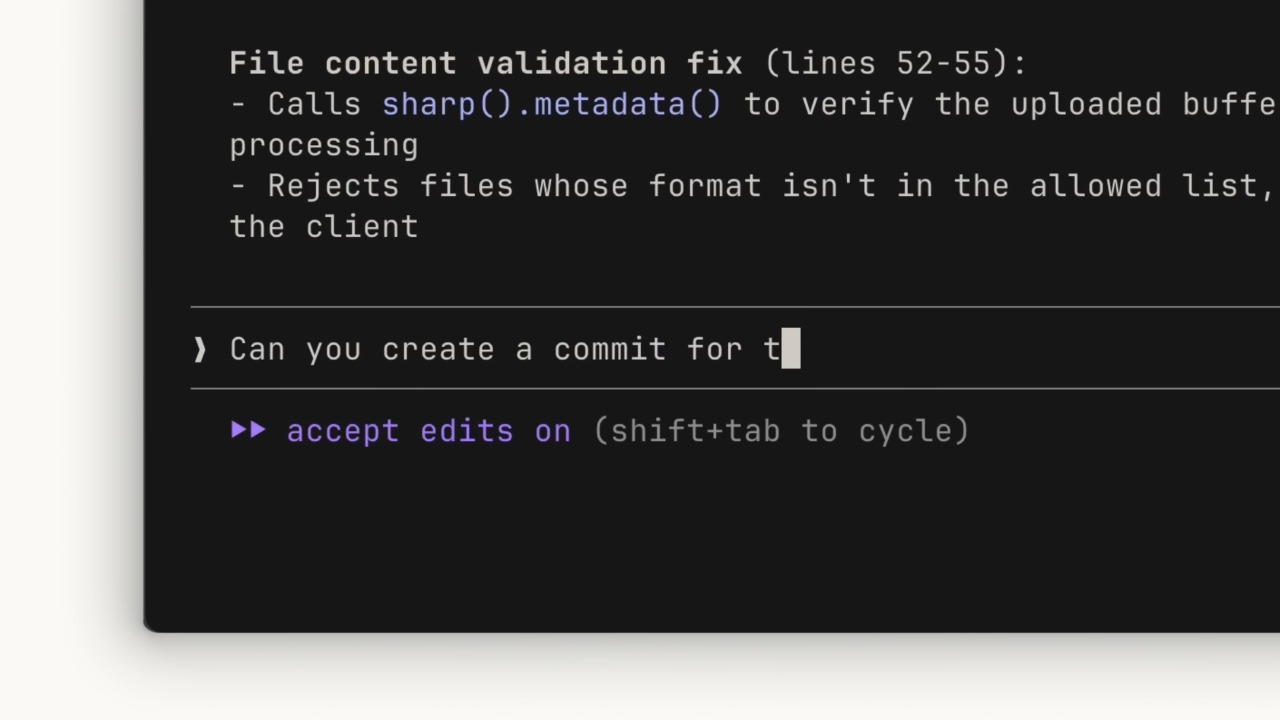
Claude 能帮你写测试,但交给它之前,确保测试对你和团队是可信的真理来源,避免假阳性。小技巧:Claude 老是踩同一个坑,就让它把解决办法存进 CLAUDE.md。你自测满意后,就该推代码了——提交前先跑一个子智能体代码审查员(sub-agent code reviewer)过一遍。

循环往复
然后让 Claude 按你的风格生成提交信息,如此往复。探索给 Claude 项目所需的相关上下文;计划产出 Claude 用来判断成功与否的行动方案;编码是你和 Claude 在敲定最终结果前的来回;提交帮你审查并推送代码,好开始下一个功能。
逐字稿原文 · 中文 / English
00:04 如果你只带走一样东西,就让它是这个工作流:探索、计划、编码、提交。处理前两步最快的方式是计划模式——Claude 不能编辑文件,只读取以收集研究。一直按 Shift+Tab 直到看到计划模式。
00:38 Claude 读取相关文件、做网页搜索、给出一份计划。审查它;这是最适合纠偏的地方,因为还没写任何代码。不进计划模式时,你也可以直接让 Claude 探索你的代码库。
01:08 计划看起来不错后,选择批准,让 Claude 逐条勾掉清单项。计划完成后,我们保留了「它是怎么得到结果的」这层上下文,用来指导它下一步的决策。
01:35 要让 Claude 有信心,它必须清楚什么算正确——把这点写明确。添加工具:做 Web UI 时,Claude in Chrome 扩展让 Claude Code 能控制一个标签页并测试 UI。提供一套它能据以校验的测试集。
02:06 让测试成为真理来源,避免假阳性。如果 Claude 老是撞同一个问题,让它把解决方案保存进它的 CLAUDE.md。提交之前,跑一个子智能体代码审查员。
02:35 然后让 Claude 按你的风格生成提交信息。如此循环往复。探索给出上下文,计划创建行动方案,编码是来回打磨,提交审查并推送你的代码。
00:04 If you take one thing away, let it be this workflow: Explore, Plan, Code, Commit. The fastest way to handle steps one and two is plan mode — Claude can't edit files, just reads to gather research. Hit Shift+Tab until you see plan mode.
00:38 Claude reads relevant files, does web searches, gives a plan. Review it; this is the best place to course-correct because it's before any code is written. You can also use explore without plan mode by asking Claude to explore your code base.
01:08 Once the plan looks good, select approve and let Claude toggle through the list items. After the plan is finished we have the context of how it got to the results to guide its next decision.
01:35 For Claude to be confident, it must be clear on what it deems correct — make this explicit. Add tools: for web UIs, the Claude in Chrome extension lets Claude Code control a tab and test the UI. Include a test suite it can validate on.
02:06 Make tests a source of truth to avoid false positives. If Claude keeps running into the same issues, ask it to save the solution to its CLAUDE.md. Before you commit, run a sub-agent code reviewer.
02:35 Then get Claude to generate a commit message in your style. Rinse and repeat. Explore gives context, Plan creates the action plan, Code is the back-and-forth, Commit reviews and pushes your code.
/compact、/clear、/context 管理它,并用「具体的提示词」和「子智能体」来省着花。每个动作都在占空间
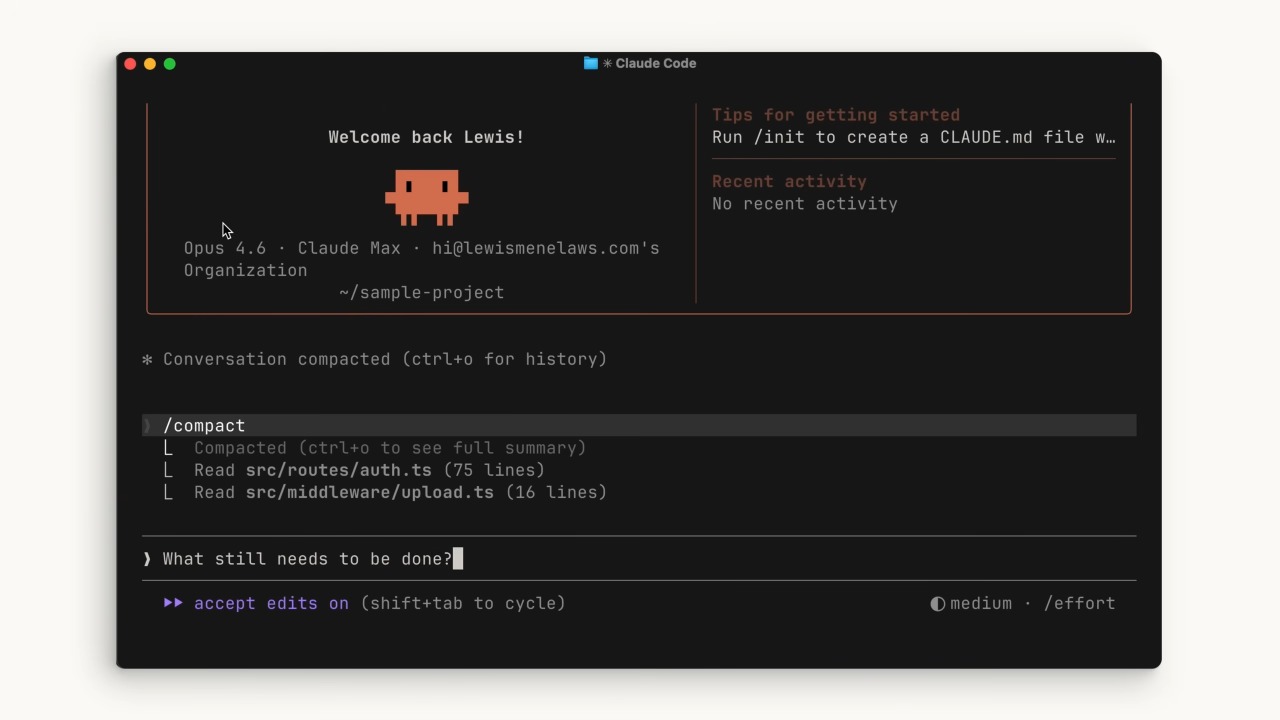
你发的每条消息、它读的每个文件、跑的每条命令、每个工具调用结果,都会加进上下文窗口。空间有限,所以尽可能优化它极其重要。

/compact
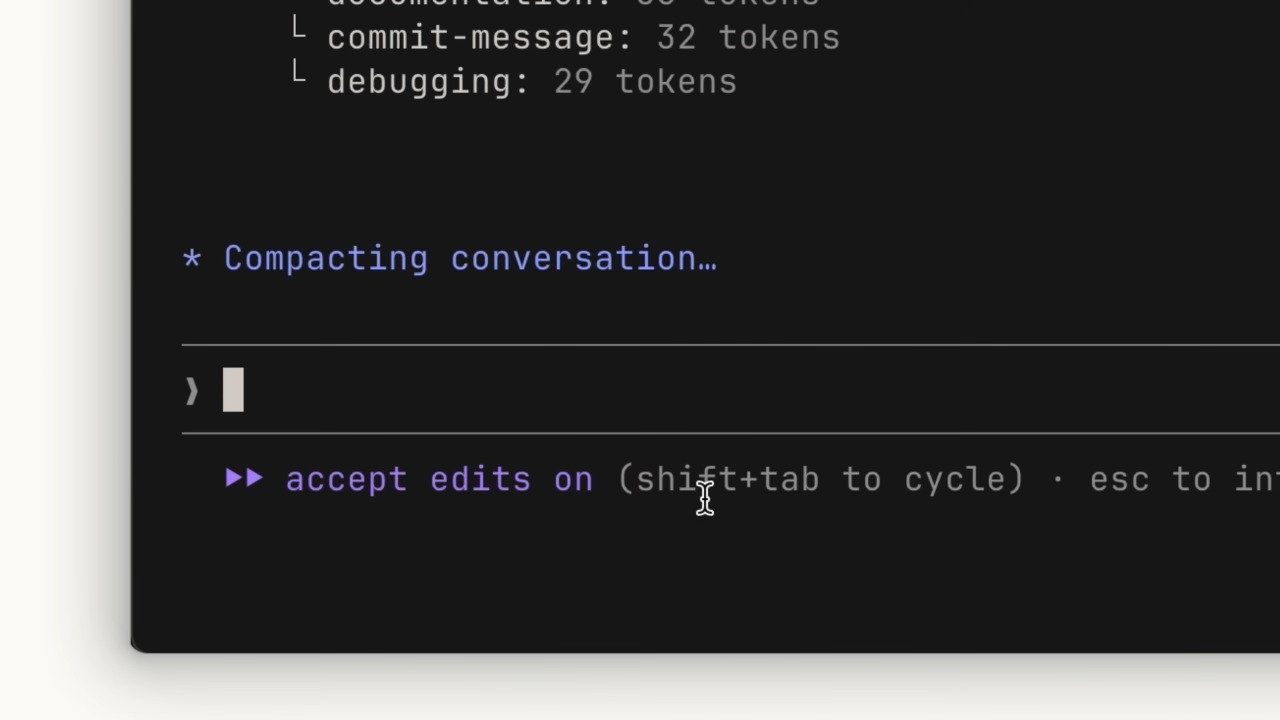
接近上限时会自动压缩:总结要点、移除不必要的工具调用结果、腾出大量空间(注意可能丢失之前对话的细节)。也能手动 /compact,把目前为止做的都压缩掉——既清出空间,又保留对之前工作的记忆。
/compact # 总结并压缩当前会话,保留记忆
/clear 与 /context
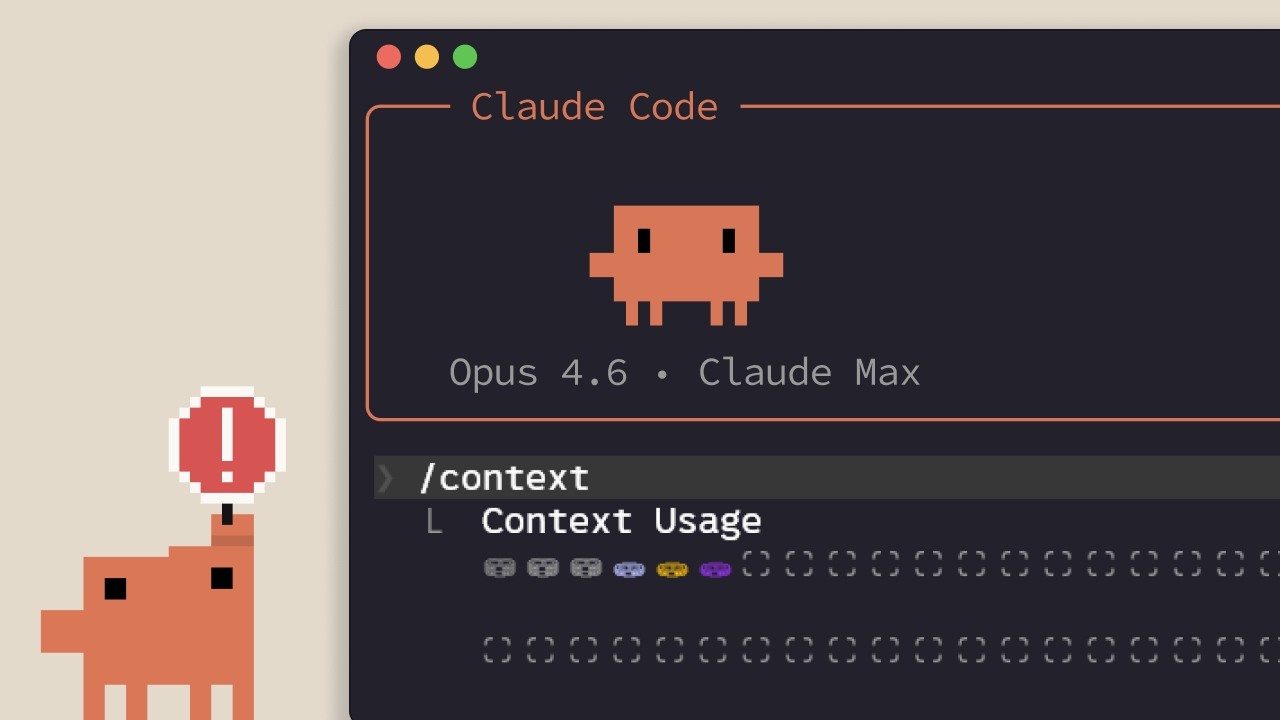
想彻底从零开始、不要之前记忆,用 /clear。想看上下文状态,用 /context:能看到上下文有多大、哪些类别占得最多,还有一张可视化图。
/clear     # 清空一切,从零开始
/context   # 查看上下文占用全景图

经验法则
正在做某个功能、上下文要满了但还得继续 → compact(保留该功能相关上下文很重要)。一个计划做完、要开新功能 → clear(别让旧对话给新东西带偏)。想让 Claude 跨会话记住的,写进 CLAUDE.md,省得它每次重新发现。
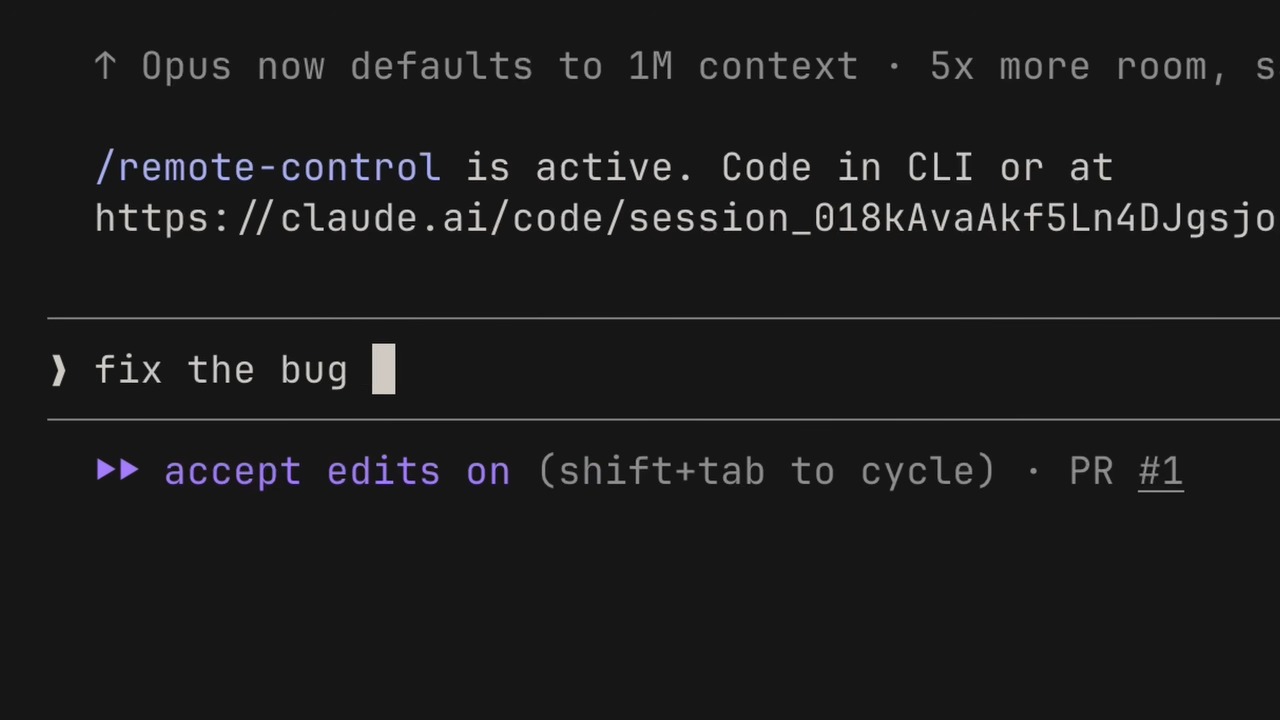
短提示词的反讽
写得越短,长远反而越费上下文:不说清楚,Claude 就被迫在代码库里到处翻、自己猜,这比你多写一两句把话讲清楚要费多得多的上下文空间。
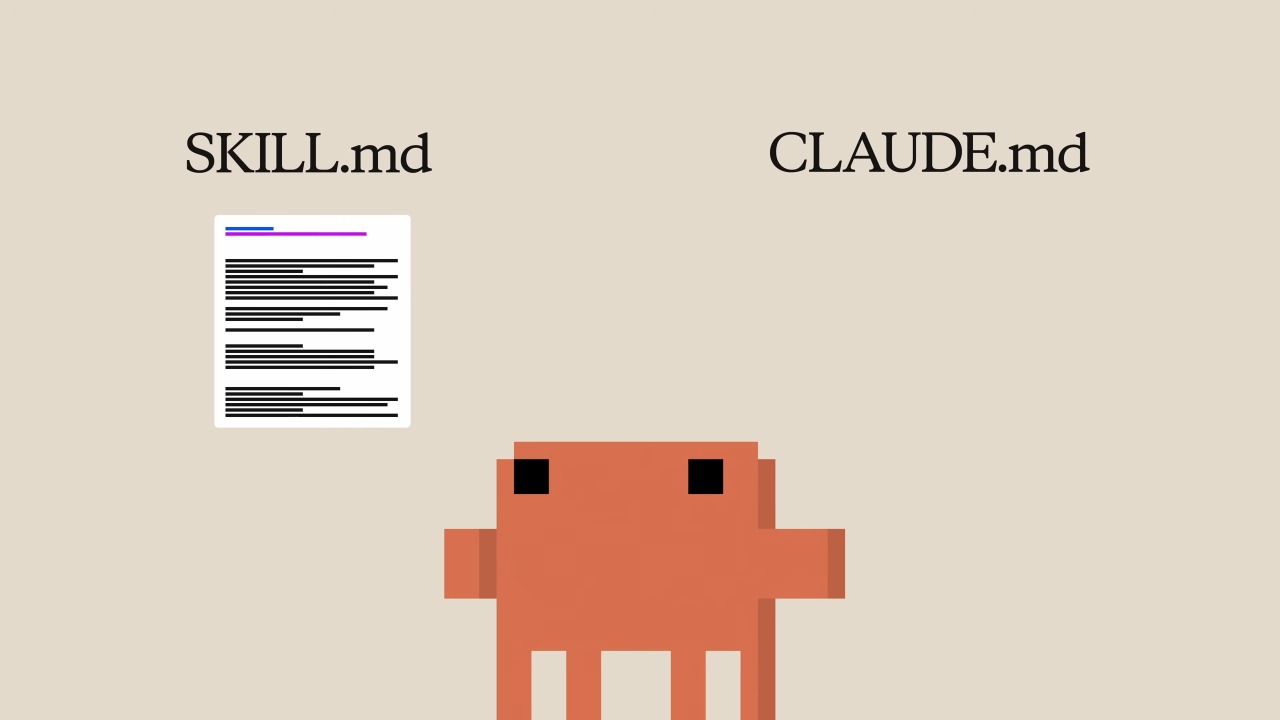
三个省上下文的杠杆
MCP 服务器默认会把所有可用工具都加载进上下文,和项目无关的可以关掉。技能(skills)和 MCP 类似但不会把整个东西塞进上下文,更省空间。子智能体与主智能体并行、有完全独立的上下文窗口——对那种「只要答案、不要过程」的任务(比如「认证端点在哪」),让子智能体去做,只把摘要返回给主智能体。
管理上下文至关重要:用 /compact 总结长会话、/clear 重新开始;提示词要具体;查清楚当前上下文被谁占用;用子智能体去接那些「你只要结果」的任务。
逐字稿原文 · 中文 / English
00:00 上下文是 Claude 的工作记忆。它读的每个文件、跑的每条命令、你发的每条消息,都占用上下文窗口的空间。它是有限的,所以优化它极其重要。
00:39 接近上限时,上下文窗口会自动压缩——它总结并移除不必要的工具调用结果(可能丢失细节)。手动运行 /compact,把到目前为止的内容压缩,同时保留记忆。
01:08 想完全从零开始,运行 /clear。想查看状态,运行 /context——展示你上下文大小的全景,以及哪些类别占得最多。
01:37 经验法则:在做某功能、超出但需要继续 → compact。一个计划做完、要开新的 → clear。需要跨会话记住的,写进 CLAUDE.md。
02:04 短提示词的反讽:长远看它反而更耗上下文。不说清楚,Claude 会在你代码库里翻得更多、自己思考更多——比多写清楚一两句话耗费多得多的上下文。
02:36 MCP 服务器默认把所有工具加载进上下文——把无关的关掉。技能的工作方式类似,但不会把整个东西塞进上下文。子智能体并行运行、有独立的上下文窗口;对只要答案的任务,只返回一份摘要。
03:09 长会话用 /compact,重新开始用 /clear。要具体。查清楚是谁在占用上下文。用子智能体去接那些只要答案的任务。
00:00 Context is Claude's working memory. Every file it reads, command it runs, message you send takes up space in the context window. It's finite, so optimizing it is extremely important.
00:39 When you approach the limit, the context window is automatically compacted — it summarizes and removes unnecessary tool call results (may lose details). Run /compact manually to compact up to that point while keeping memory.
01:08 To start completely fresh, run /clear. To check state, run /context — a big picture of your context size and what categories take the most.
01:37 Rule of thumb: working a feature and going over but need to continue → compact. Finished a plan and starting new → clear. For things to remember across sessions, put it in CLAUDE.md.
02:04 The irony of a smaller prompt: long-run it takes more context. Without being explicit, Claude looks around your codebase more and does its own thinking — far more context than a clearer sentence or two.
02:36 MCP servers load all tools into context by default — turn off unrelated ones. Skills work similarly but don't put the whole thing into context. Sub-agents run in parallel with a separate context window; for answer-only tasks, return just a summary.
03:09 Use /compact for long sessions and /clear to start fresh. Be specific. Check what's using context. Use sub-agents to delegate answer-only tasks.
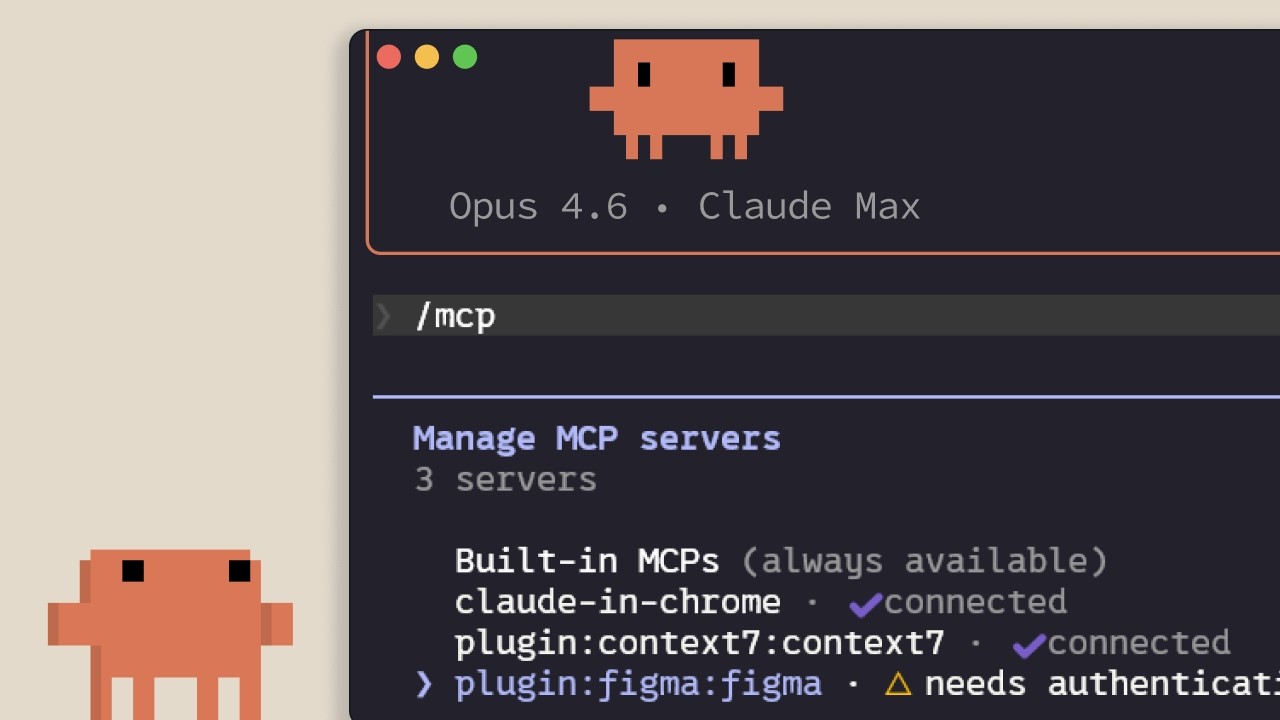
claude mcp add 添加,用 .mcp.json 让团队自动共享,并留意它对上下文的占用。Model Context Protocol
一个开放标准,让 Claude Code 连接外部工具和数据源。你提问时,Claude 会自动判断何时该用这些工具来更好地理解你的需求。你的很多上下文其实在别处——数据库、效率工具、公开仓库——MCP 就是把它们接进来。
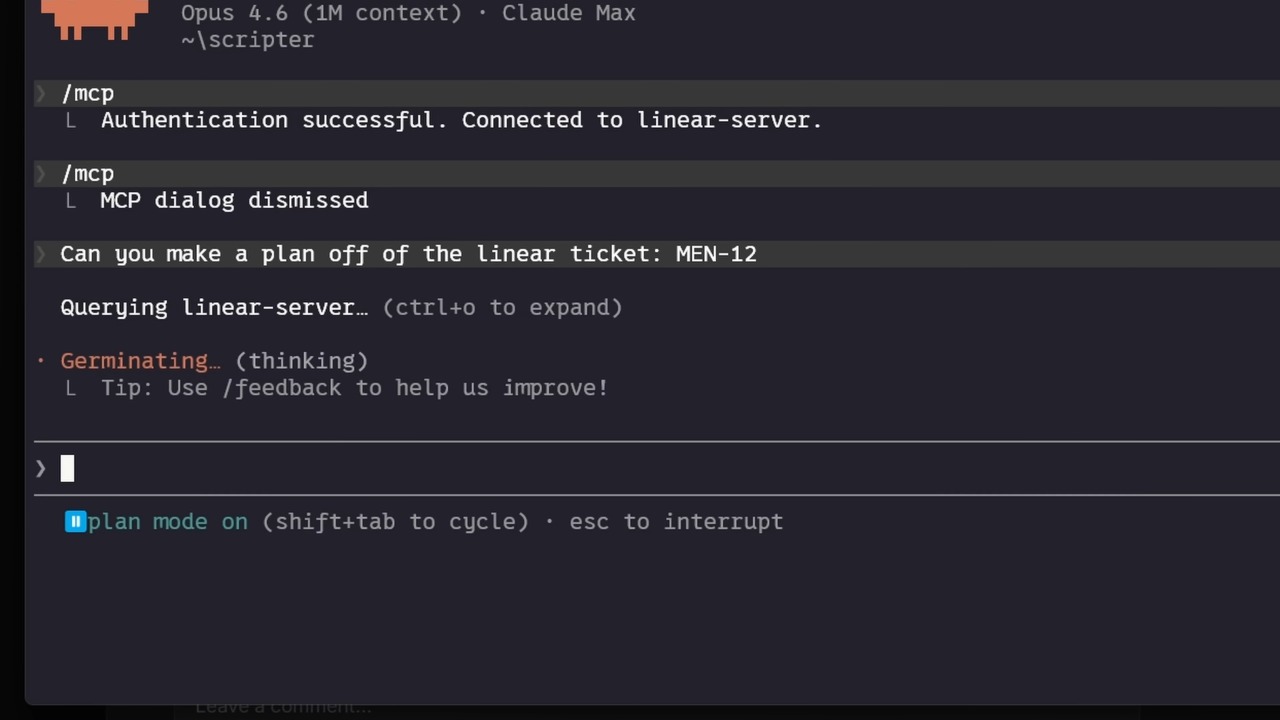
用例:Linear、Context7
「工具」让 Claude Code 这类智能体能执行动作去更好完成任务(普通 AI 通常只回你一段文本)。例如团队用 Linear 做项目管理,就加个 Linear MCP 把具体 issue 详情带进来;想拿某依赖的最新文档,Context7 MCP 能提供给 Claude Code。
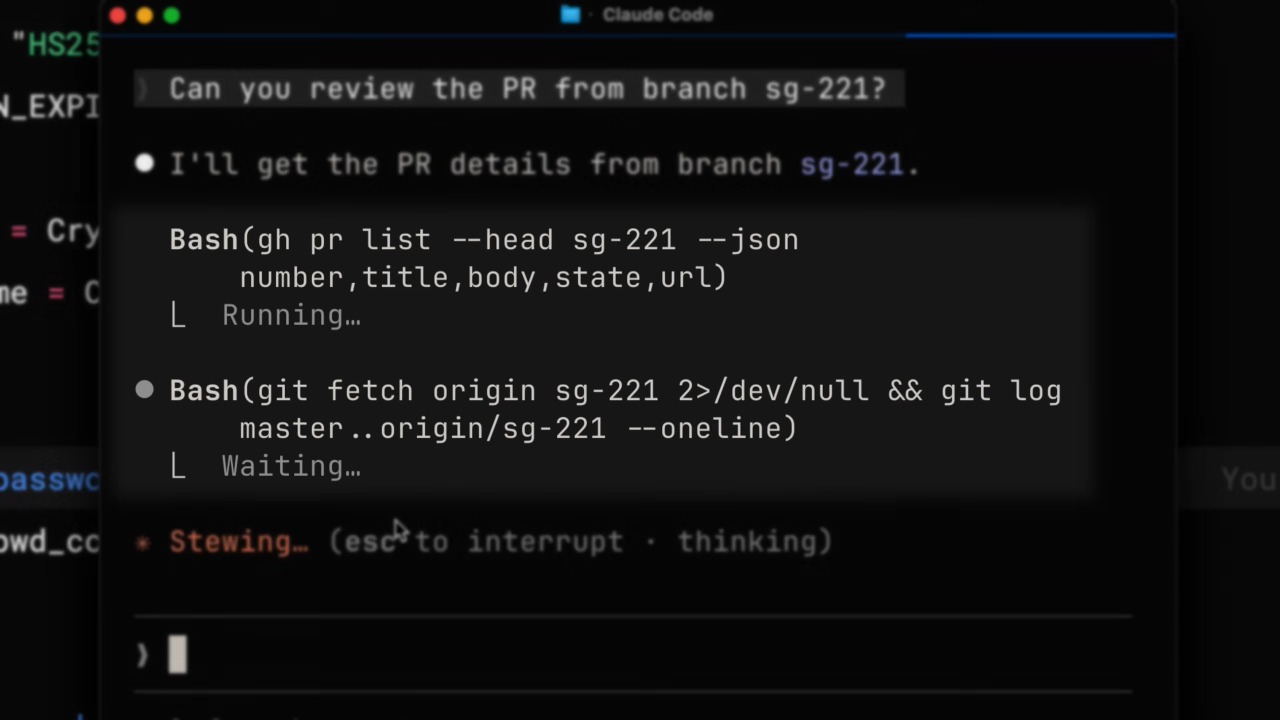
claude mcp add · HTTP vs STDIO
更多连接器见 claude.com/connectors。用 claude mcp add 添加。两种主要类型:HTTP 服务器用于远程服务,由服务方托管、走网络连接;STDIO 服务器用于跑在你本机的本地进程。会话里用 /mcp 查看连了哪些、状态、并禁用不想要的。
claude mcp add ...   # 添加一个 MCP 服务器
/mcp                 # 会话内查看 / 管理已连服务器
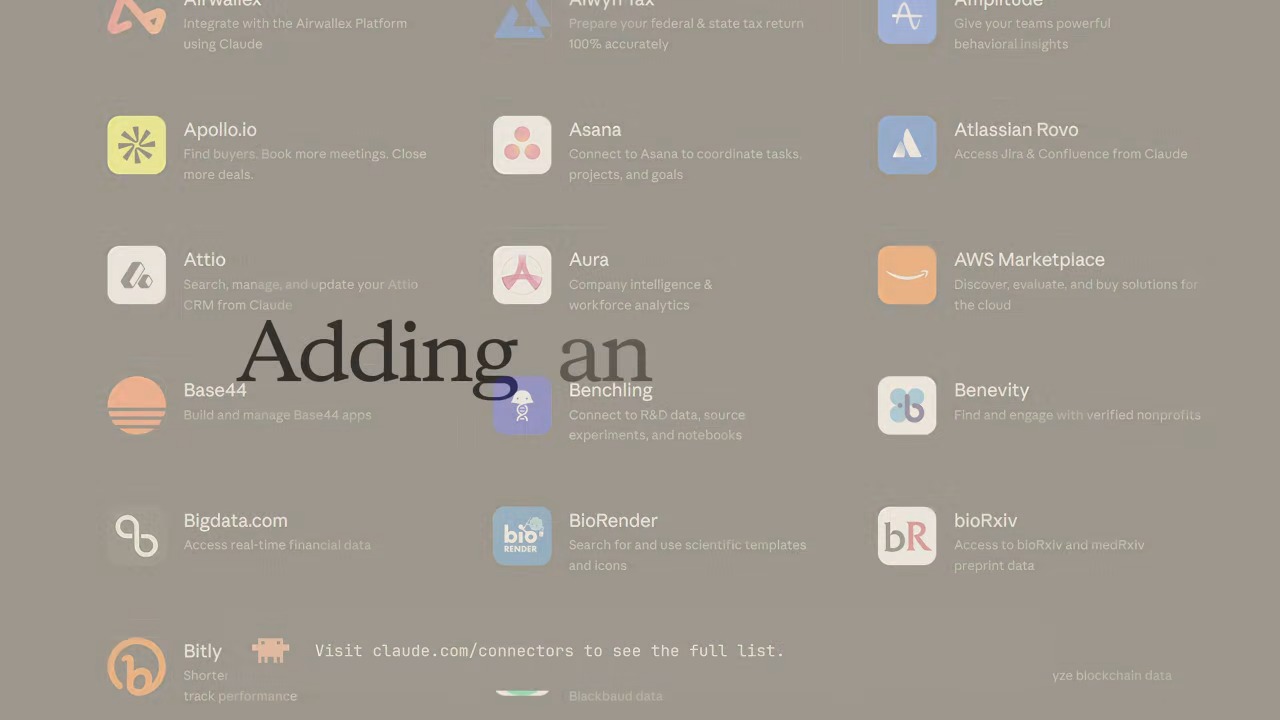
local / user / project
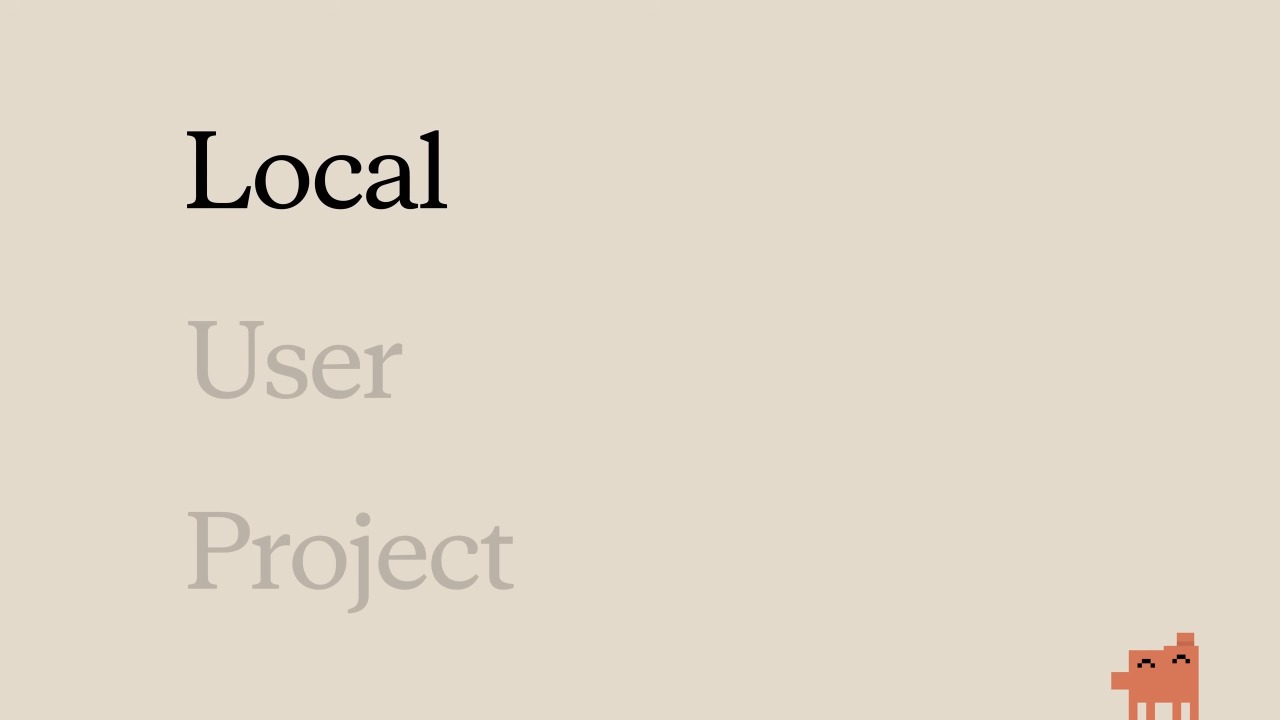
local:只在当前项目、只对你可用。user:对你所有项目可用。project:用一个提交进版本控制的 .mcp.json 文件,任何在这代码库工作的人都自动得到完全相同的服务器。
没用也占空间
MCP 服务器即使你没用,也会把工具定义加进上下文窗口。配多了就吃掉可用上下文。用 /mcp 看连了什么,禁用不在用的。若某工具有 CLI 等价物(如 GitHub 用 gh、AWS 用 aws),CLI 更省上下文,因为它不加常驻工具定义。
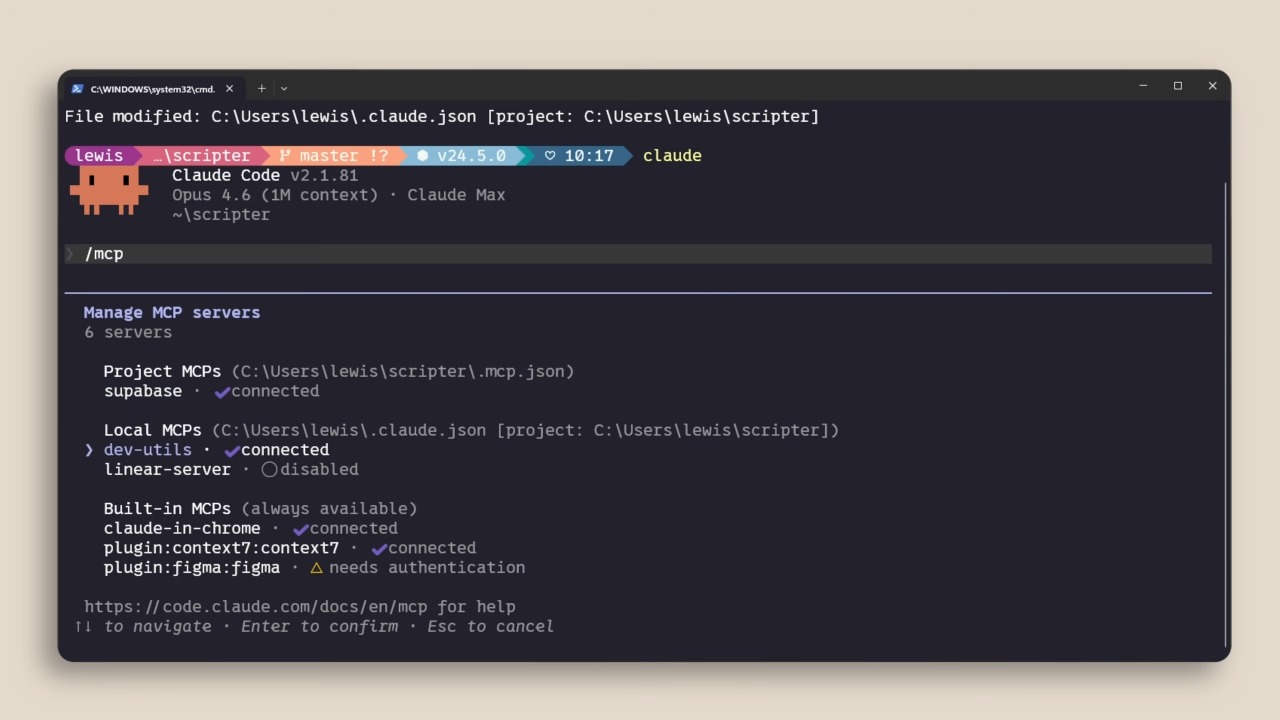
超 10% 自动切「工具搜索」
这种场景也可以用技能(skill):技能只把名字和描述加载进上下文,当 Claude 觉得需要时才把它载入——CLI 工具就可以放进技能里。如果 MCP 工具超过上下文窗口的 10%,Claude Code 会自动切到工具搜索模式,按需发现工具(但因为不在上下文里,效果可能没那么好)。小结:claude mcp add 添加、用 .mcp.json 让团队自动获得、靠禁用不用的服务器看住上下文。

逐字稿原文 · 中文 / English
00:03 模型上下文协议(MCP)是一个开放标准,让 Claude Code 连接外部工具和数据源。你的很多上下文在别处——数据库、效率工具、公开仓库。这正是 MCP 的用武之地。
00:37 工具赋予智能体执行动作的能力。如果你团队用 Linear,加一个 Linear MCP 服务器把 issue 详情带进来。要拿最新的依赖文档,Context7 MCP 服务器能提供。
01:06 claude.com/connectors 上有数百个连接器。用 claude mcp add 命令添加。HTTP 服务器用于远程服务;STDIO 服务器用于本地进程。会话里用 /mcp 查看连了什么。
01:40 三种作用域:local(当前项目、你自己)、user(你所有项目)、project(提交进版本控制的 .mcp.json,整个团队自动得到相同服务器)。
02:12 MCP 服务器即使没用也会把工具定义加进上下文。运行 /mcp 把没用的禁用。如果某工具有 CLI 等价物(gh、aws),CLI 更省上下文。
02:45 技能只把名字和描述加载进上下文,需要时才完整载入。如果 MCP 工具超过你上下文窗口的 10%,Claude Code 会切到工具搜索模式。回顾:用 claude mcp add 添加、用 .mcp.json 设作用域、靠禁用没用的服务器看住上下文。
00:03 Model Context Protocol is an open standard that lets Claude Code connect to external tools and data sources. A lot of your context lives elsewhere — databases, productivity apps, public repositories. This is where MCP comes in.
00:37 Tools give agents the ability to perform actions. If your team uses Linear, add a Linear MCP server to bring in issue details. For up-to-date dependency docs, the Context7 MCP server provides that.
01:06 Hundreds of connectors at claude.com/connectors. Add with the claude mcp add command. HTTP servers are for remote services; STDIO servers for local processes. Use /mcp inside a session to see what's connected.
01:40 Scoped three ways: local (current project, you), user (all your projects), project (a .mcp.json checked into version control so the whole team gets the same servers automatically).
02:12 MCP servers add tool definitions to context even when unused. Run /mcp and disable unused ones. If a tool has a CLI equivalent (gh, aws), the CLI is more context-efficient.
02:45 A skill loads just a name and description into context, loaded fully only when needed. If MCP tools exceed 10% of your context window, Claude Code switches to tool search mode. Recap: add with claude mcp add, scope with .mcp.json, watch context by disabling unused servers.
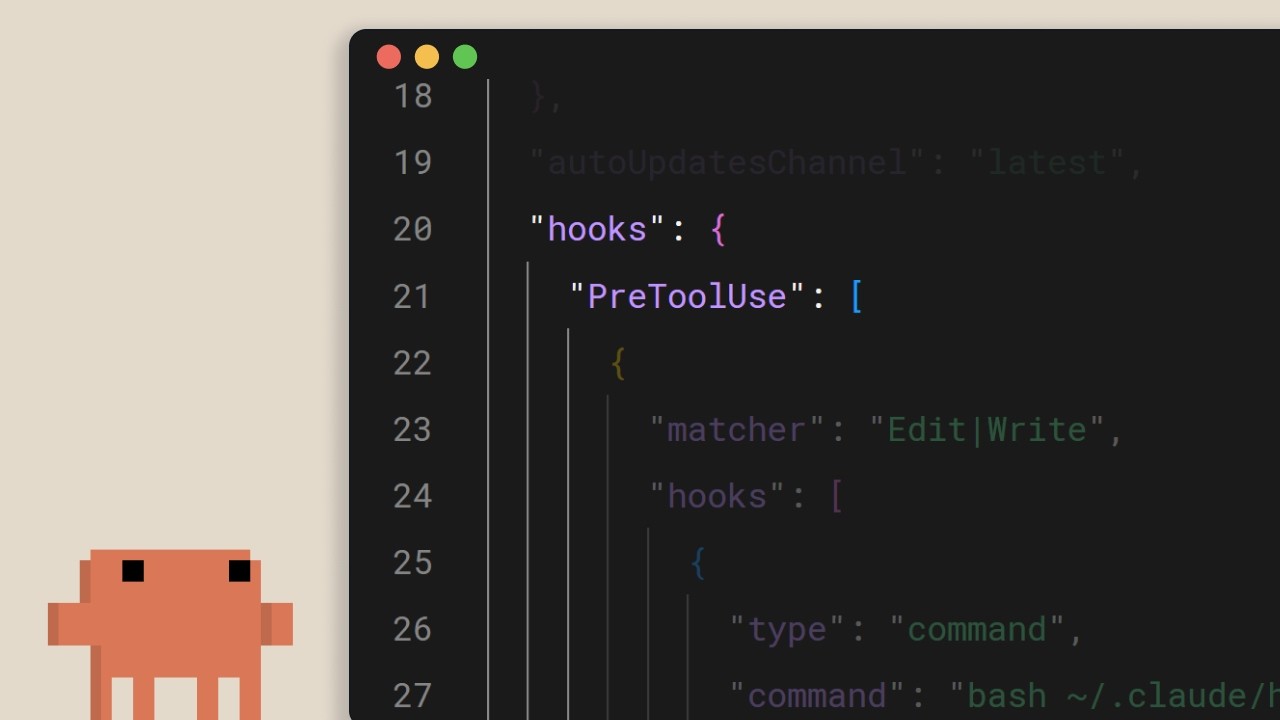
提示词「大概率」,Hook「百分百」
你在 CLAUDE.md 里写「每次改文件后跑 Prettier」,大多数时候它会做,但偶尔不做——不完美。而 hook 让这件事每一次、无例外都发生。常见用途:编辑后自动格式化、为合规记录所有执行过的命令、拦截危险操作(如改生产文件)、Claude 完成任务时给自己发通知。
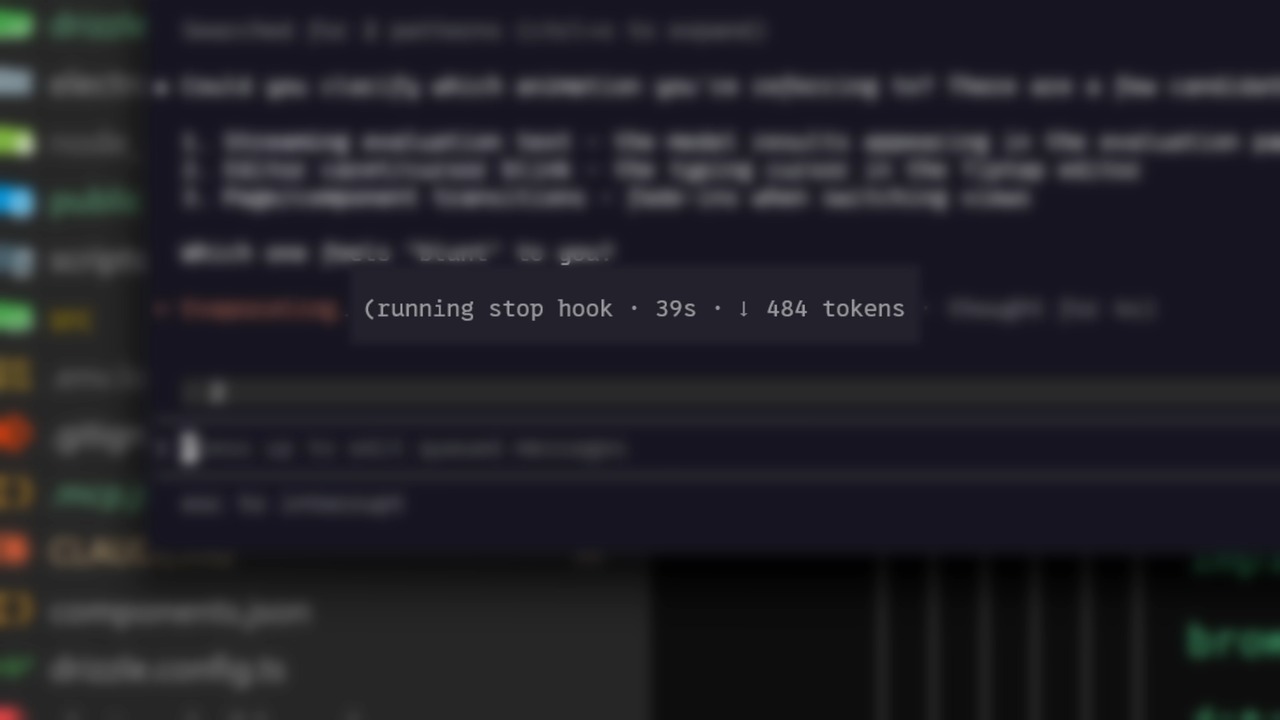
在 settings.json 里配
选一个事件,可选地为「哪个工具」设 matcher,再给一条要跑的命令。事件包括:
# 五个生命周期事件
UserPromptSubmit  你提交提示词、Claude 处理前
PreToolUse        某个工具调用前
PostToolUse       某个工具调用完成后
Notification      Claude 发通知时
Stop              Claude 结束响应时

PostToolUse + matcher
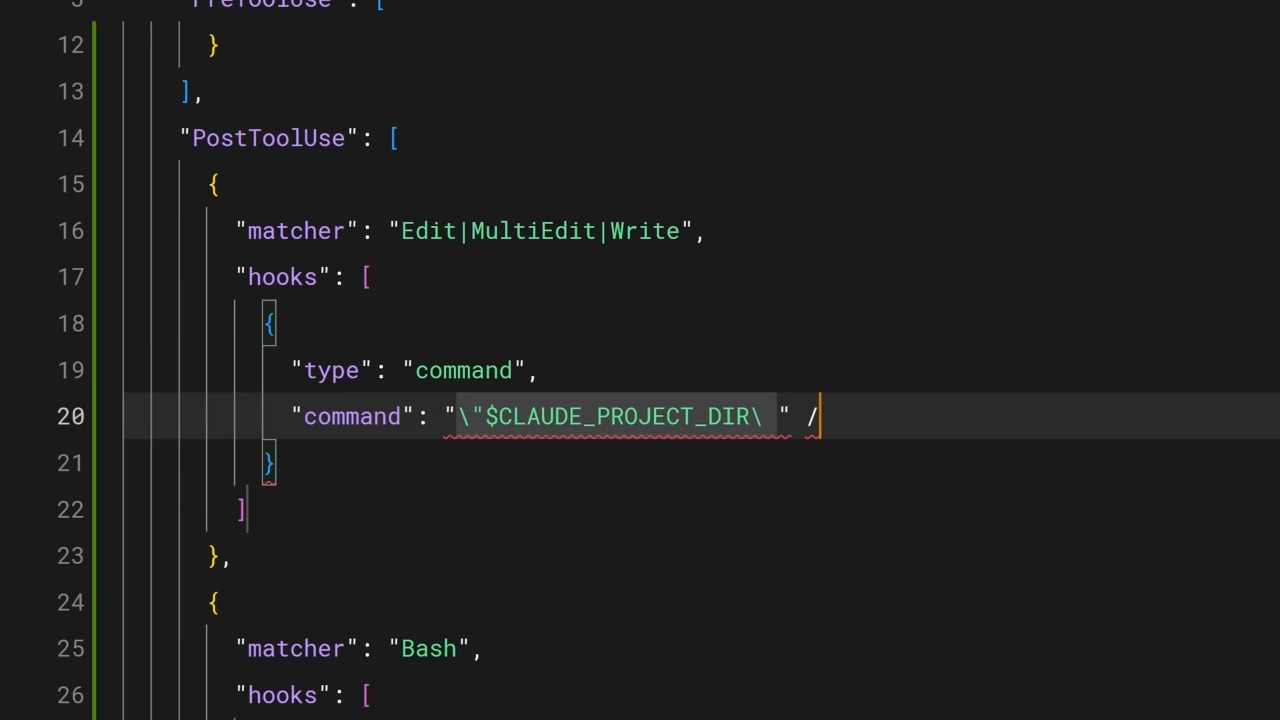
最常见的 hook 就是「编辑后自动格式化」:设一个 PostToolUse hook,matcher 设为 Edit 或 MultiEdit,这样 Claude 一改文件就触发。命令里判断文件扩展名跑对应格式化器——TypeScript 用 Prettier、Go 用 gofmt、Python 用 Ruff,看你项目用什么。

退出码 0 放行 / 2 拦截
PreToolUse hook 能在工具调用执行前拦下它。你的 hook 从 stdin 收到 JSON 格式的工具名和输入:退出码 0 = 放行;退出码 2 = 拦截,并把 stderr 的信息反馈给 Claude,让它知道为何被拦、好做调整。这就是怎么落地硬规则:禁止写生产配置目录、禁止含 rm -rf 的 bash 命令、禁止提交到 main——凡是团队要的是「保证」而非「建议」的。
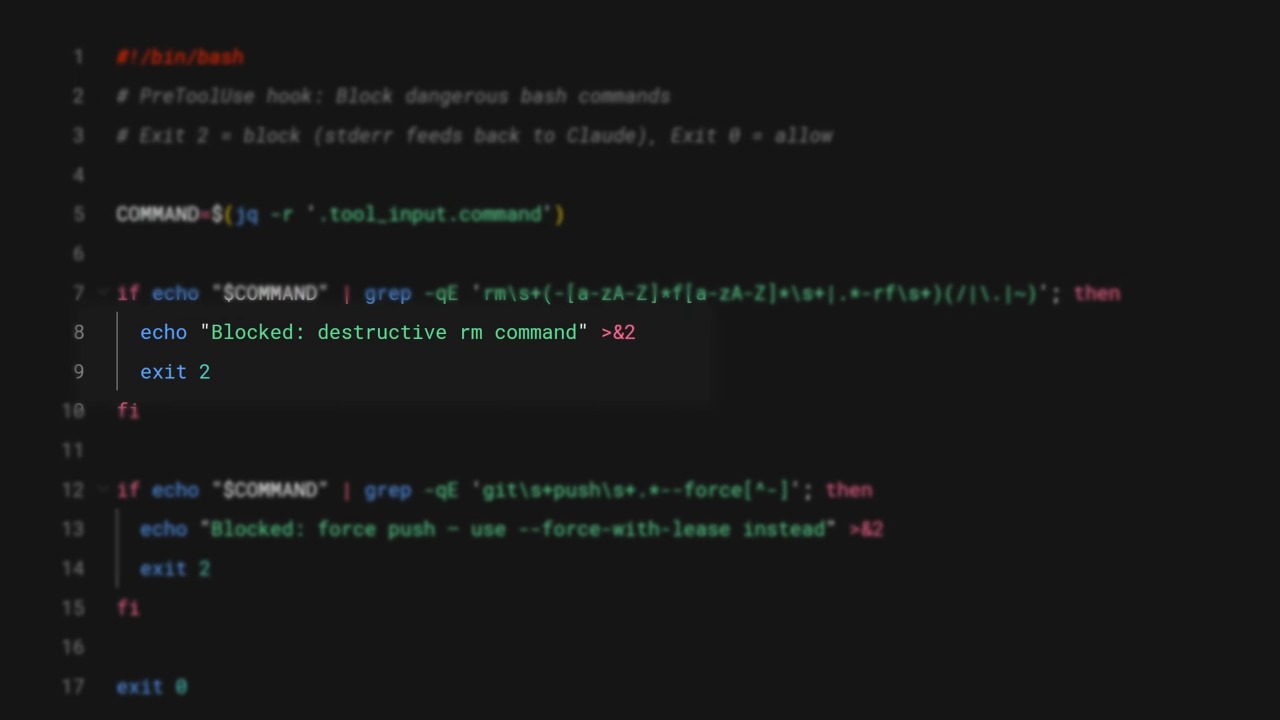
提交进仓库,全队共享
配在 .claude/settings.json 的 hooks 是项目级、能提交进仓库,整个团队自动获得相同 hooks。命令里用环境变量 CLAUDE_PROJECT_DIR 引用项目内脚本,这样无论 Claude 当前工作目录在哪都能用。小结:用 PostToolUse 做自动格式化和日志,用 PreToolUse 拦危险操作,在 /hooks 菜单或 settings.json 里配置并提交进仓库。要每次都发生、不能失败的事,别放进提示词——放进 hook。
# 项目级,提交进版本控制,全队共享
.claude/settings.json
# 命令里引用项目脚本
$CLAUDE_PROJECT_DIR/scripts/format.sh
# 也可在会话里用菜单配置
/hooks
逐字稿原文 · 中文 / English
00:03 Hooks 让你在 Claude Code 生命周期的不同时点运行命令。和其它一切不同,hooks 是确定性的——它们总会运行。CLAUDE.md 里的指令大多数时候被遵守但并非总是;hook 让它每一次都发生。
00:42 Hooks 在你的 settings.json 里配置。选一个事件,可选地为「哪个工具」设 matcher,再给一条命令。事件有:UserPromptSubmit、PreToolUse、PostToolUse、Notification、Stop。
01:16 最常见的 hook:编辑后自动格式化——一个 PostToolUse hook,matcher 设为 Edit 或 MultiEdit。命令检查文件扩展名并运行格式化器(TS 用 Prettier、Go 用 gofmt、Python 用 Ruff)。
01:55 PreToolUse hooks 能拦截工具调用。hook 从 stdin 收到 JSON 格式的工具名和输入。退出码 0 表示放行;退出码 2 表示拦截,并把 stderr 反馈给 Claude。可用来拦截写生产配置、rm -rf、提交到 main。
02:31 .claude/settings.json 里的 hooks 是项目级的,能提交进仓库,让整个团队都获得。用 CLAUDE_PROJECT_DIR 环境变量引用项目脚本。如果某件事必须每次都发生、不能失败,把它放进 hook,而不是提示词。
00:03 Hooks let you run commands at different points in Claude Code's life cycle. Unlike everything else, hooks are deterministic — they always run. A CLAUDE.md instruction is followed most of the time but not always; a hook makes it happen every single time.
00:42 Hooks are configured in your settings.json. Pick an event, optionally a matcher for which tool, and a command. Events: UserPromptSubmit, PreToolUse, PostToolUse, Notification, Stop.
01:16 The most common hook: auto-formatting after edits — a PostToolUse hook with a matcher of Edit or MultiEdit. The command checks the file extension and runs the formatter (Prettier for TS, gofmt for Go, Ruff for Python).
01:55 PreToolUse hooks can block tool calls. The hook gets the tool name and input as JSON on stdin. Exit code 0 means proceed; exit code 2 means block, and stderr is fed back to Claude. Block prod config writes, rm -rf, commits to main.
02:31 Hooks in .claude/settings.json are project-level and can be checked into your repo so the whole team gets them. Use the CLAUDE_PROJECT_DIR env var to reference project scripts. If it needs to happen every time without fail, put it in a hook, not a prompt.